This post may contain affiliate links. Please read our disclosure policy.
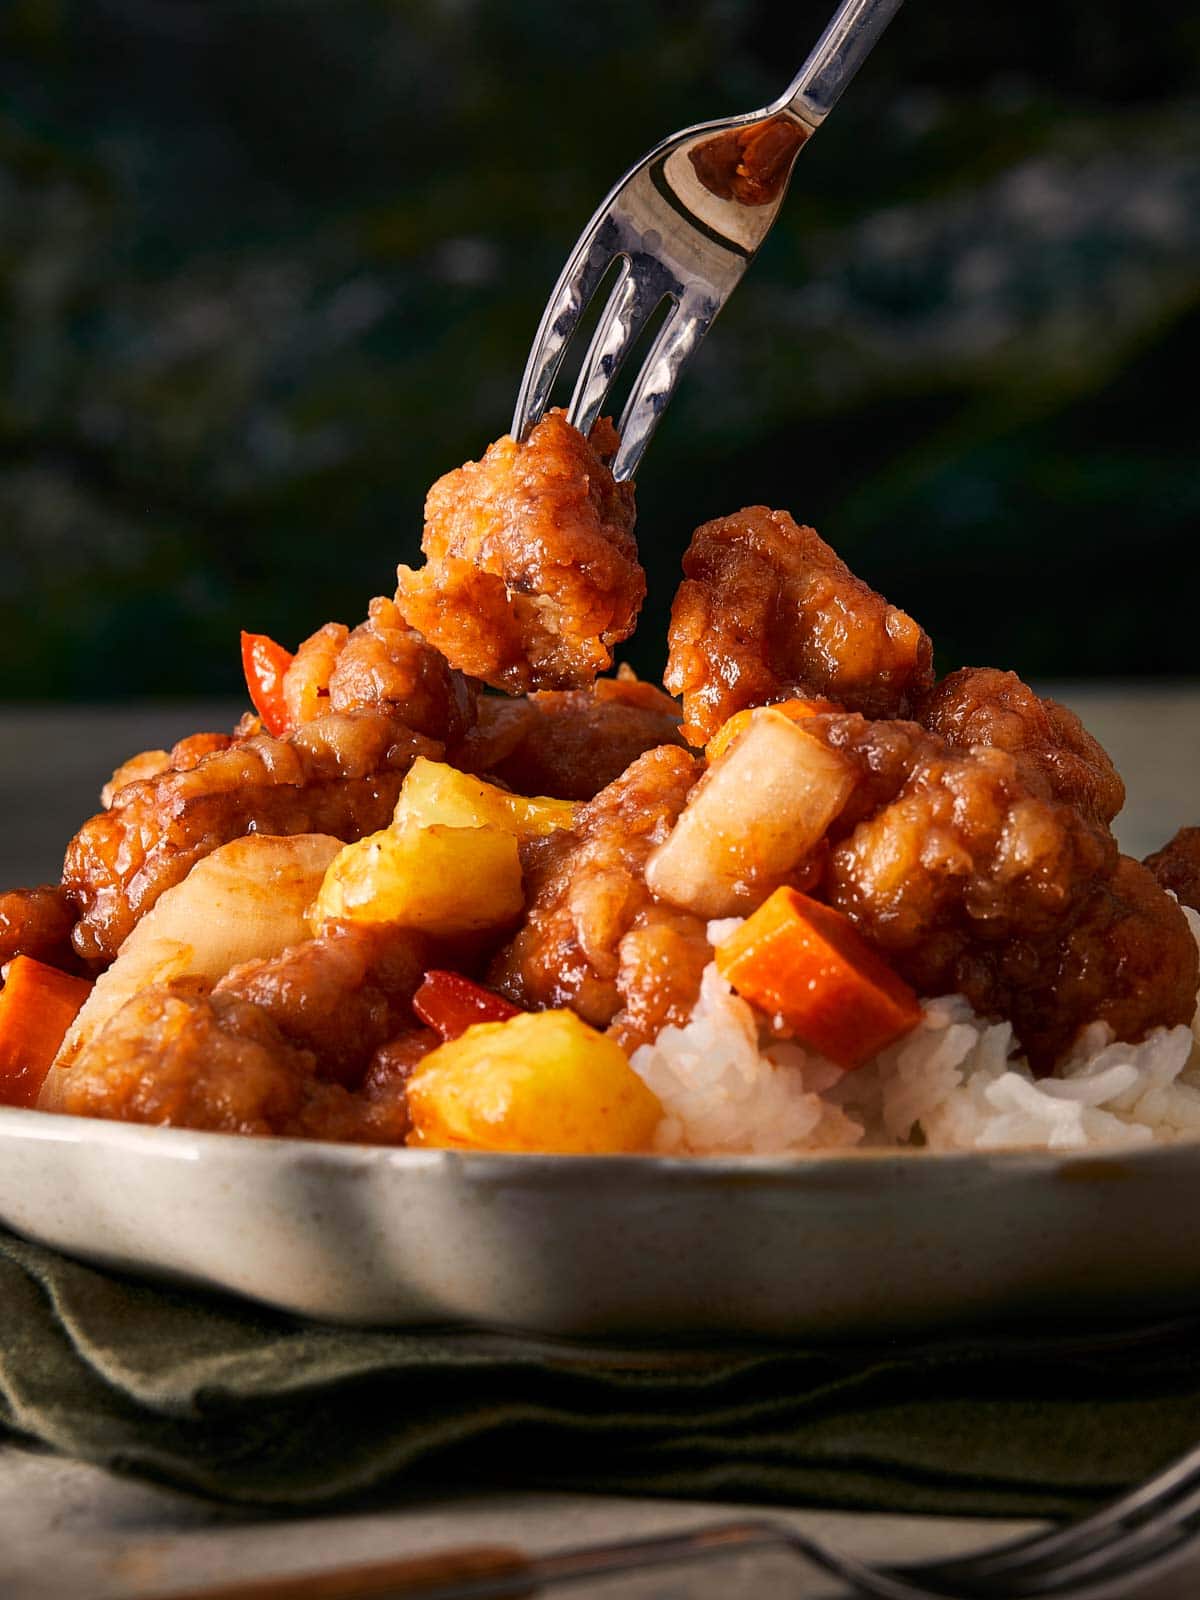
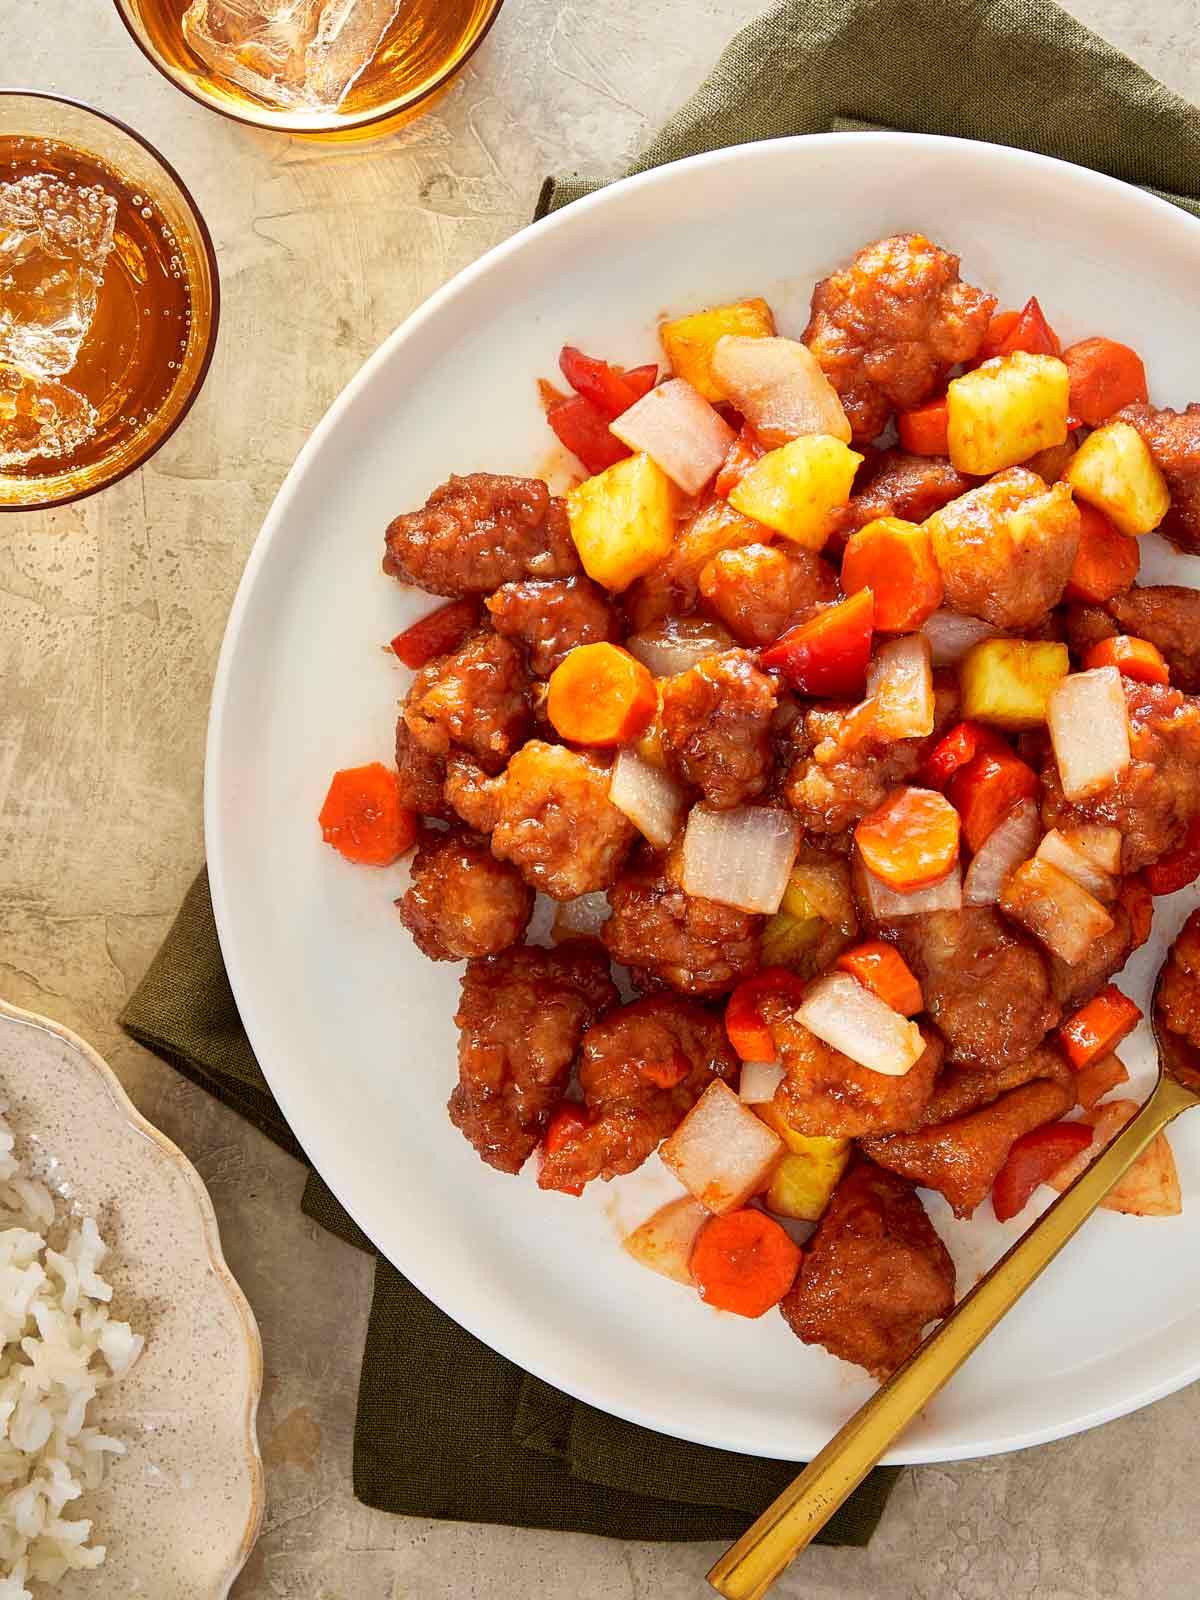
Sweet and Sour Chicken became one of those dishes people associate with my kitchen, even though I didn’t grow up making it. The first time I cooked it, I had a couple of friends dropping by without much warning and I needed something quick that felt like a real meal. The sauce came together in minutes, the chicken crisped beautifully, and before I knew it everyone was standing around the stove grabbing “just one more piece”.
What surprised me was how quickly it turned into a regular request. My daughter started making it by her own, a coworker asked for the recipe after trying leftovers, and now it’s the dish I turn to when I want something that brings people to the table without a lot of planning. The balance of sweet and sour hits the spot every time, and the whole thing cooks faster than most takeout orders.
Why This Recipe Works
One thing I noticed after making this dish over and over is how well the method holds up on busy days.
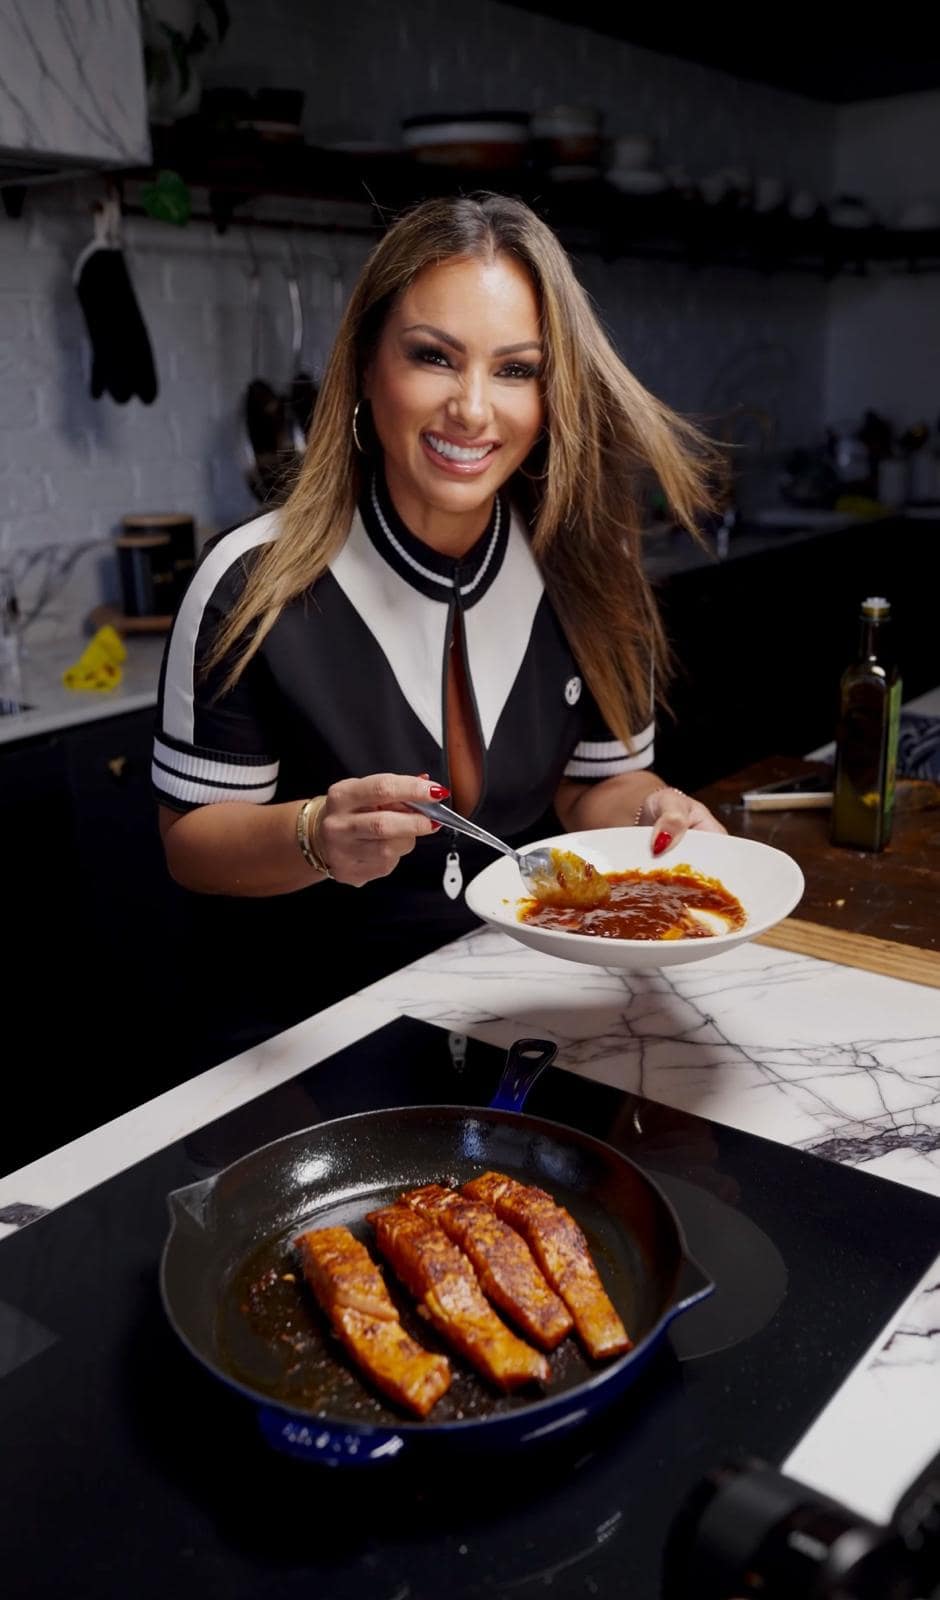
- The chicken is coated in a light mixture that crisps in just a few minutes when it hits a hot skillet. That little bit of texture is what helps it hold onto the sauce later, and it is the reason people always ask how it stays crisp without deep frying.
- The sauce builds right in the same pot. It picks up the browned bits left behind from the chicken and thickens into that glossy coating you expect from real sweet and sour. The mix of vinegar, pineapple and sugar wasn’t accidental. It took a few rounds of adjusting before I landed on a balance that tasted bright but still full, the kind that makes you want another spoonful.
- This recipe also behaves well if you are cooking for different schedules. I have made it in a small skillet for two and I have doubled it in a wok when friends were dropping by. The chicken stays crisp, the sauce sets the same way every time and the leftovers warm up beautifully without losing their texture.
It is the kind of dish that fits into real life. No complicated steps, no extra cookware, nothing to babysit for an hour. Once the heat is on, everything moves fast and the result tastes like something you waited for.If you enjoy sticky, flavour-forward chicken dishes, you might also like this slow cooked glazed chicken dinner for an easy hands-off option.
Why you need to double fry the chicken
What makes my Sweet and Sour Chicken better is that I use the double-frying method, it takes more time but the payback in crispness is worth the trouble. I found that if you only fry the chicken once you get that soggy chicken texture. The other secret to this dish is to marinade the chicken for 20-30 mins in the refrigerator, this is called the velveting technique, it’s a chinese method to ensure the chicken breast is extra tender on the inside and crispy on the outside. If you love that sweet-meets-tangy flavor, you’ll probably enjoy my Chinese Lemon Chicken, where tender bites are coated in a glossy lemon glaze that’s bright, sticky, and ready in under 30 minutes.
And when I’m in the mood for something with a little heat, Kung Pao Chicken is always a favorite. It’s an easy stir-fry with chicken tossed in a salty-sweet-spicy sauce that clings to every piece. Bold and balanced, it brings that same restaurant-style satisfaction while keeping things fun and fresh at home.
What ingredients to use to make the best Sweet and Sour Chicken
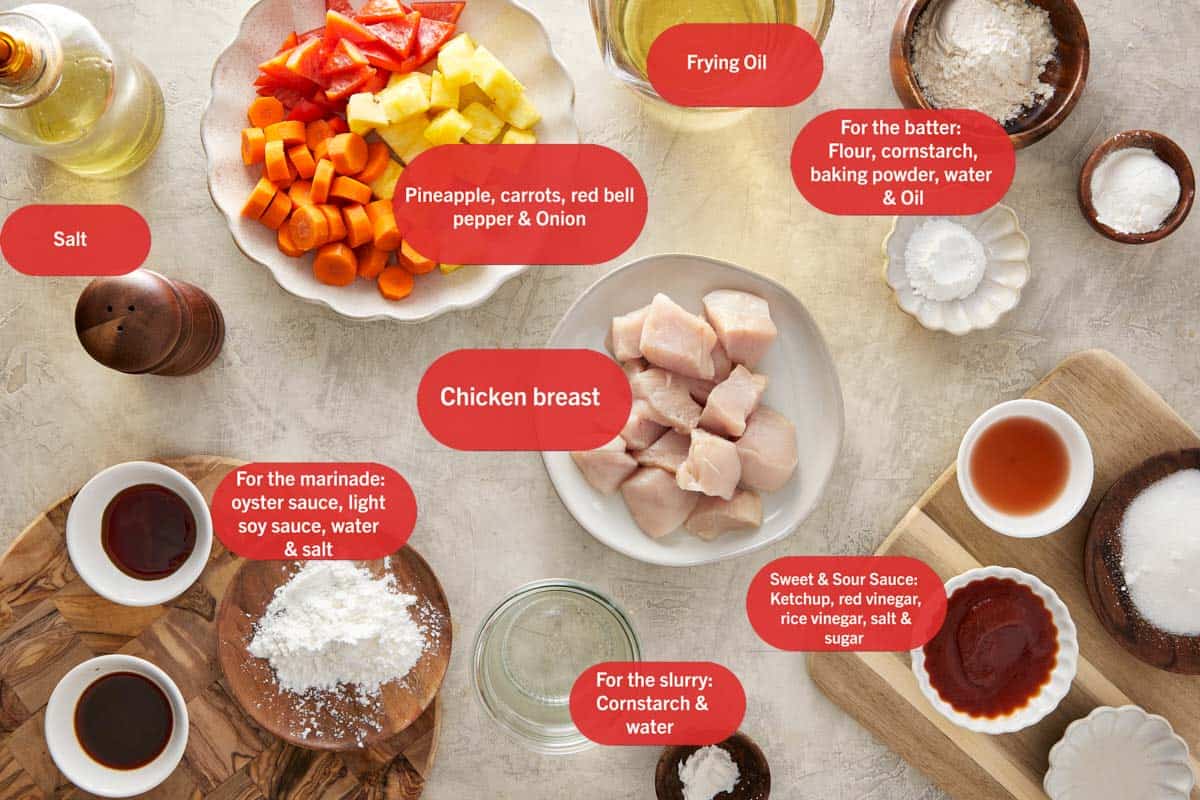
Every great Sweet and Sour Chicken starts with the basics, but it’s these star ingredients that make the dish pop:
- Chicken breast
I use chicken breast cut into small pieces so they cook quickly and stay tender inside the light coating. Letting the chicken marinate in the fridge for twenty to thirty minutes makes a noticeable difference. The seasoning has time to settle in, and the chicken browns better when it hits the hot skillet. I learned this after making the dish one night without marinating, and everyone immediately noticed it wasn’t as flavorful. - Pineapple
This is the ingredient that makes the sauce come alive. The natural sweetness softens the vinegar, and the juice thickens beautifully when it cooks down. I’ve tried making this dish without pineapple before, and the sauce always tasted like it was missing something. For me, this is the star because it gives the whole dish that bright finish people expect from real sweet and sour chicken. - Red bell pepper
Red pepper adds more than color. It keeps a bit of crunch even after simmering, which balances the soft chicken and glossy sauce. Sometimes I add extra slices because they soak up the sauce in the best way, and they make the dish feel more complete without adding extra steps. - Vinegar
This is what gives the sauce its personality. It cuts through the sweetness and keeps the dish from tasting heavy. I always reach for a little extra because I like the tang, but you can adjust it depending on how sharp you want the flavor. The vinegar is also what helps the sauce thicken properly once the heat goes up.
Note: Find the full list of ingredients and measurements in the Recipe Card.
Choosing the Best Chicken Cut and How to Handle It (My Real-Life Notes)
When I started making Sweet and Sour Chicken regularly, I learned pretty quickly that the cut of chicken you choose changes the entire dish. My family has opinions about everything I cook, so after plenty of dinners and “taste tests” at the kitchen counter, here is what consistently works.
If I’m feeding everyone at home and I want something dependable, I go with chicken breast. It stays tender as long as I let it sit in the marinade for at least twenty minutes in the fridge. My son likes it this way because the sauce clings beautifully to each piece without feeling heavy. On busier nights, when I’m bouncing between messages, laundry and whoever is walking through the kitchen, I reach for chicken thighs instead. They hold moisture better and forgive the moments when I’m distracted.
One thing that never changes is how I prep the pieces. Keeping them all roughly the same size is what helps them cook evenly and brown properly. A sharp little prep knife makes this easier, especially when cutting slightly chilled chicken. I’ve had this one for years and it still does the job well.
Before coating, I always blot the chicken dry. I remind everyone who cooks with me to do the same because excess moisture makes the coating slip off immediately. When one of my kids skips the step, the first batch always tells on them.
If you tend to trim chicken quickly like I do, a pair of kitchen shears saves time and keeps your fingers out of the way. I also keep a nonslip board on my counter so I’m not chasing chicken across the surface while cutting.
These small habits make a difference. They keep the coating crisp, the chicken juicy, and the whole dish consistent whether I’m cooking for two or making a double batch because someone invited “just a few friends” without warning.
Cooking It Up At Home
Simple moves for that sticky-tangy finish at home.
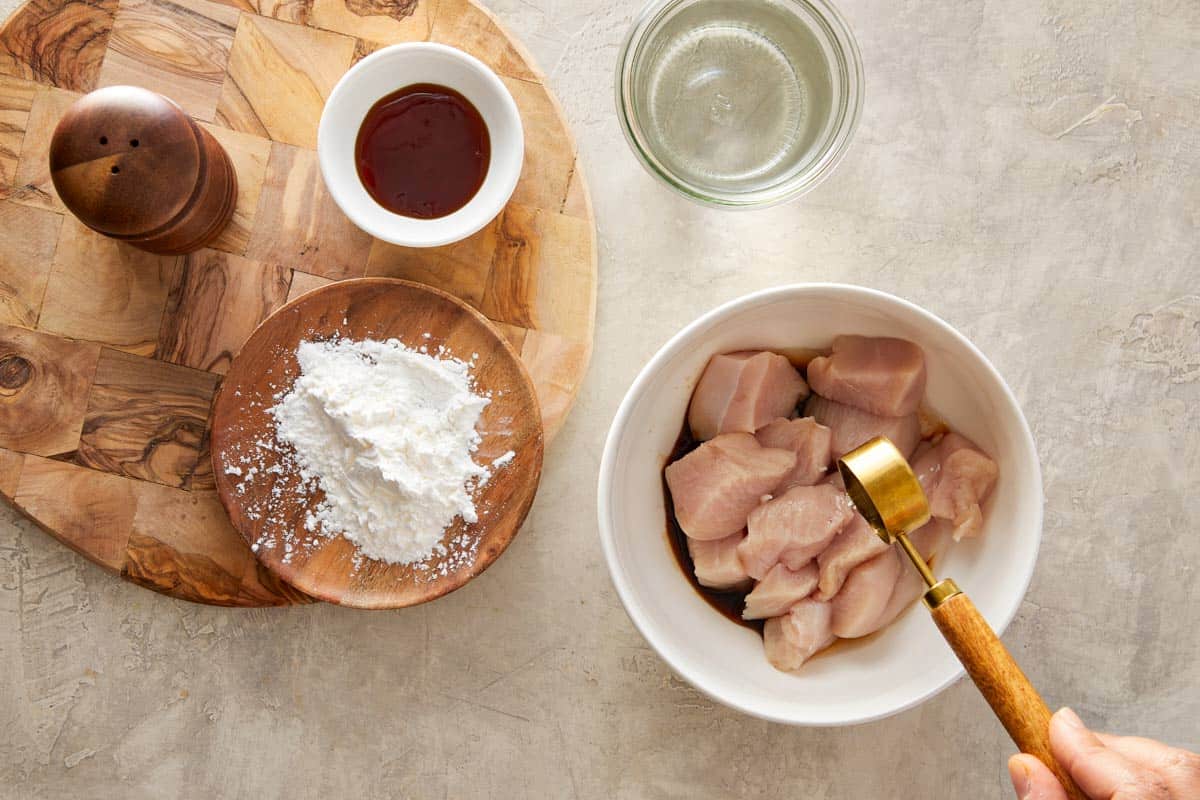
- Marinate The Chicken. Cut chicken breast into chunks and marinate with oyster sauce, soy sauce, cornstarch, water, and salt over and let it sit for 20-30 mins in the fridge.
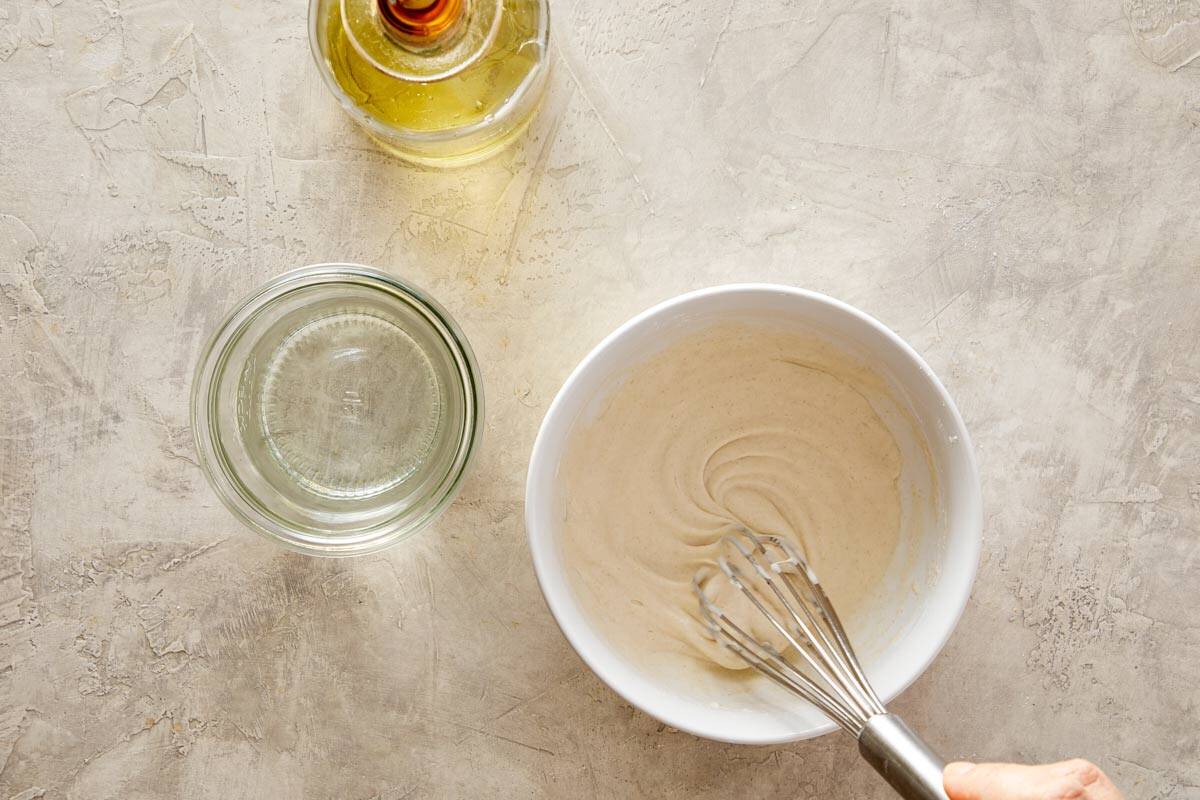
- Whisk The Batter. Mix flour, cornstarch, and baking powder; add water a bit at a time until smooth, then mix in oil.
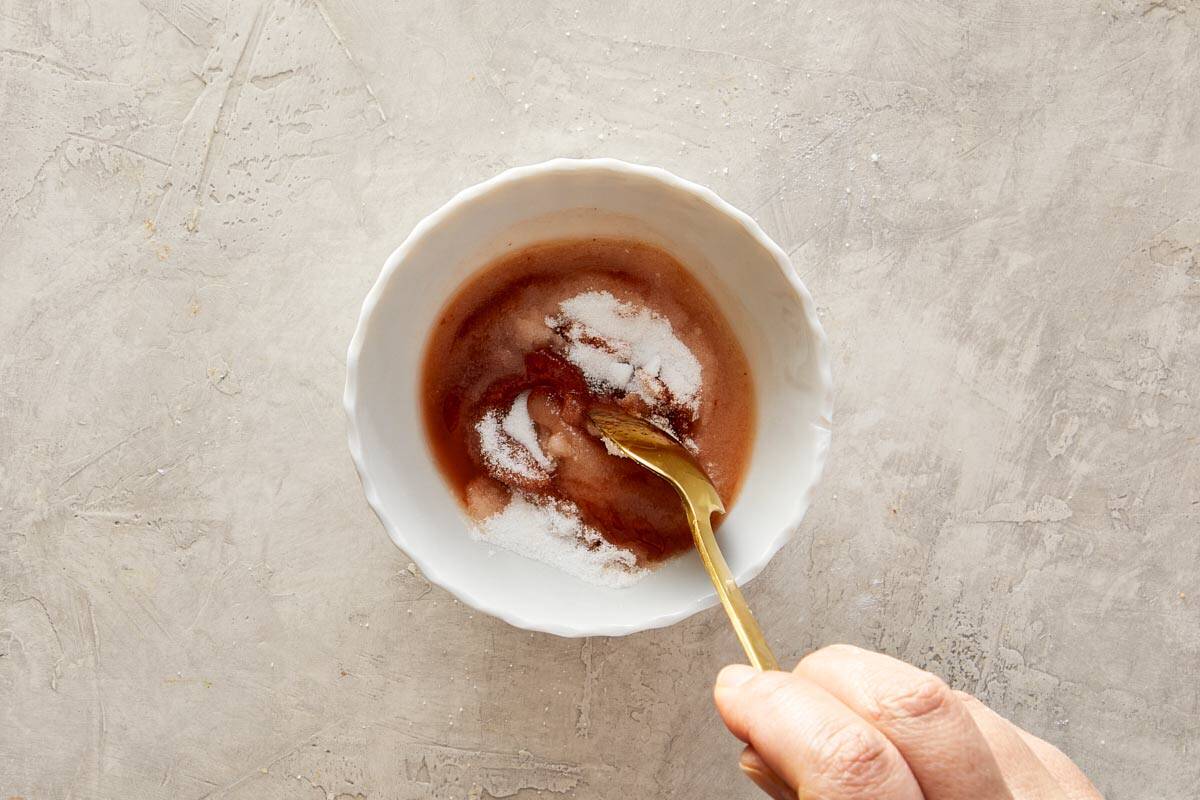
- Mix The Sauce. Combine the sweet & sour sauce ingredients in a small bowl.
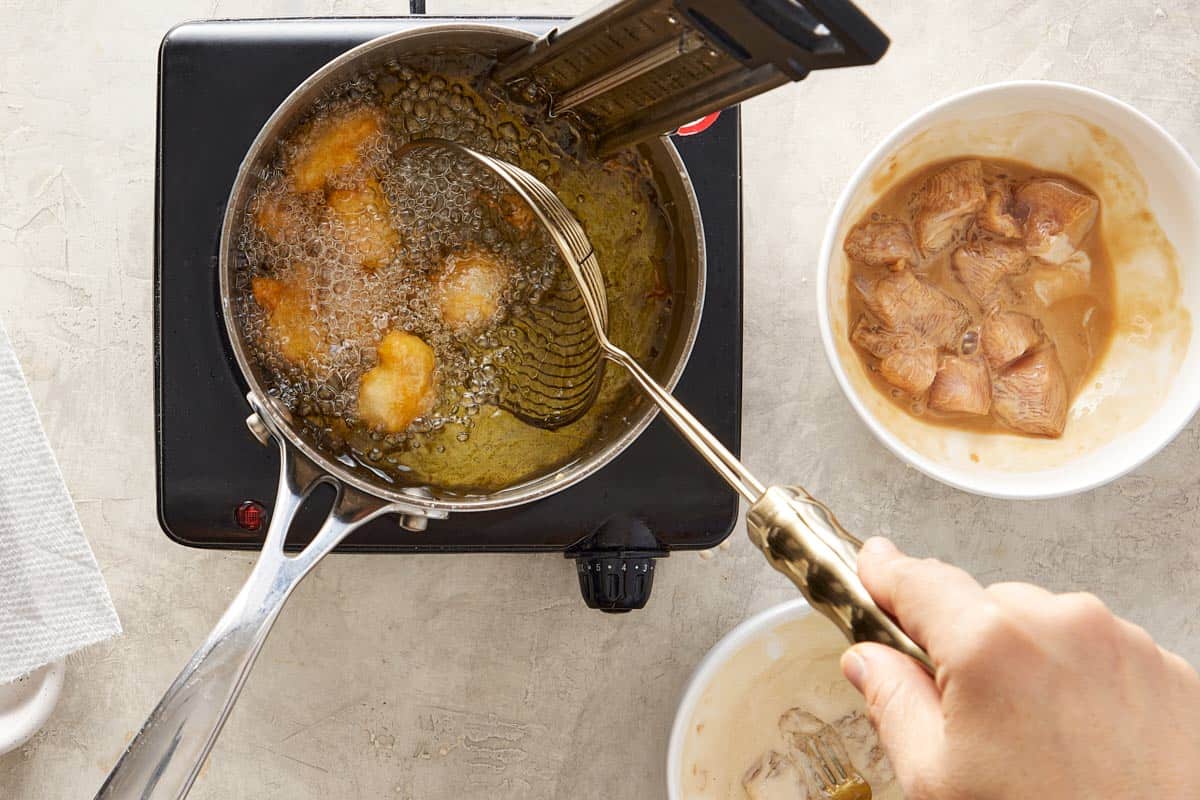
- First Fry. Heat oil, dip chicken in batter, fry until golden, and drain.
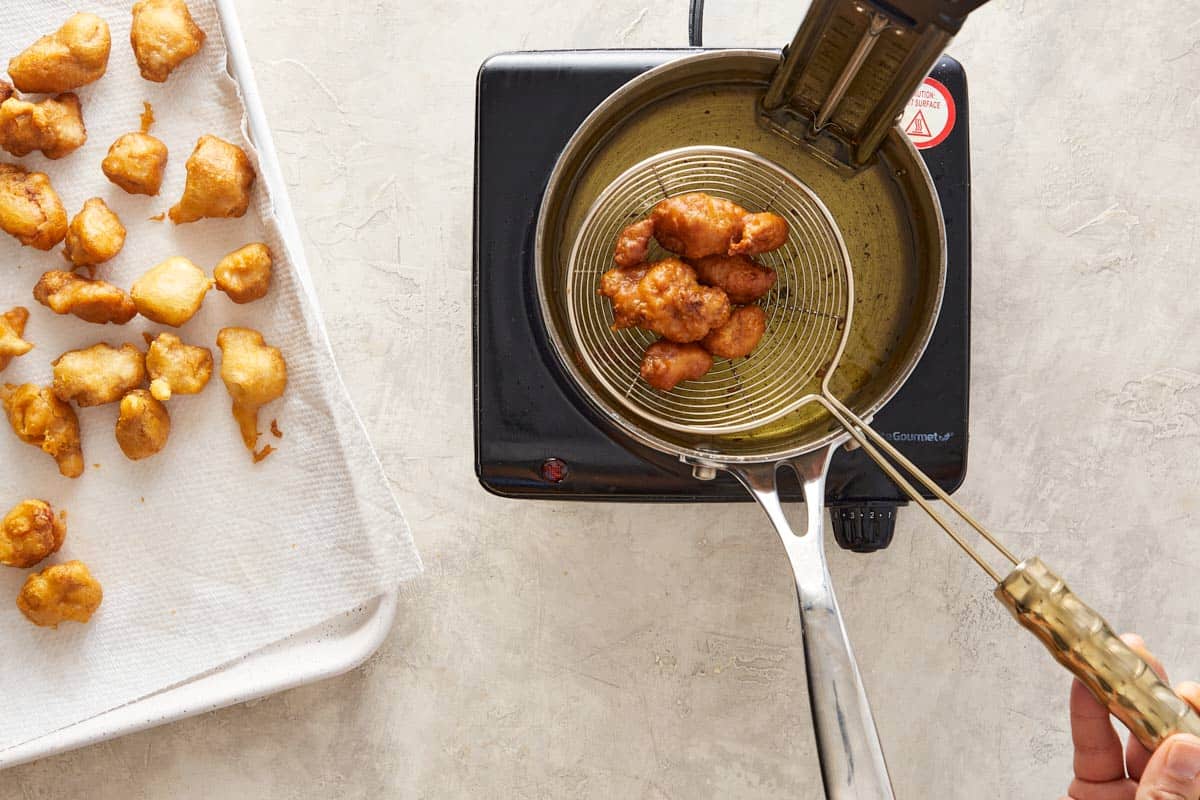
- Second Fry. Increase the heat, fry the chicken a second time briefly, and drain, leave the chicken on paper towel to soak up the extra oil.
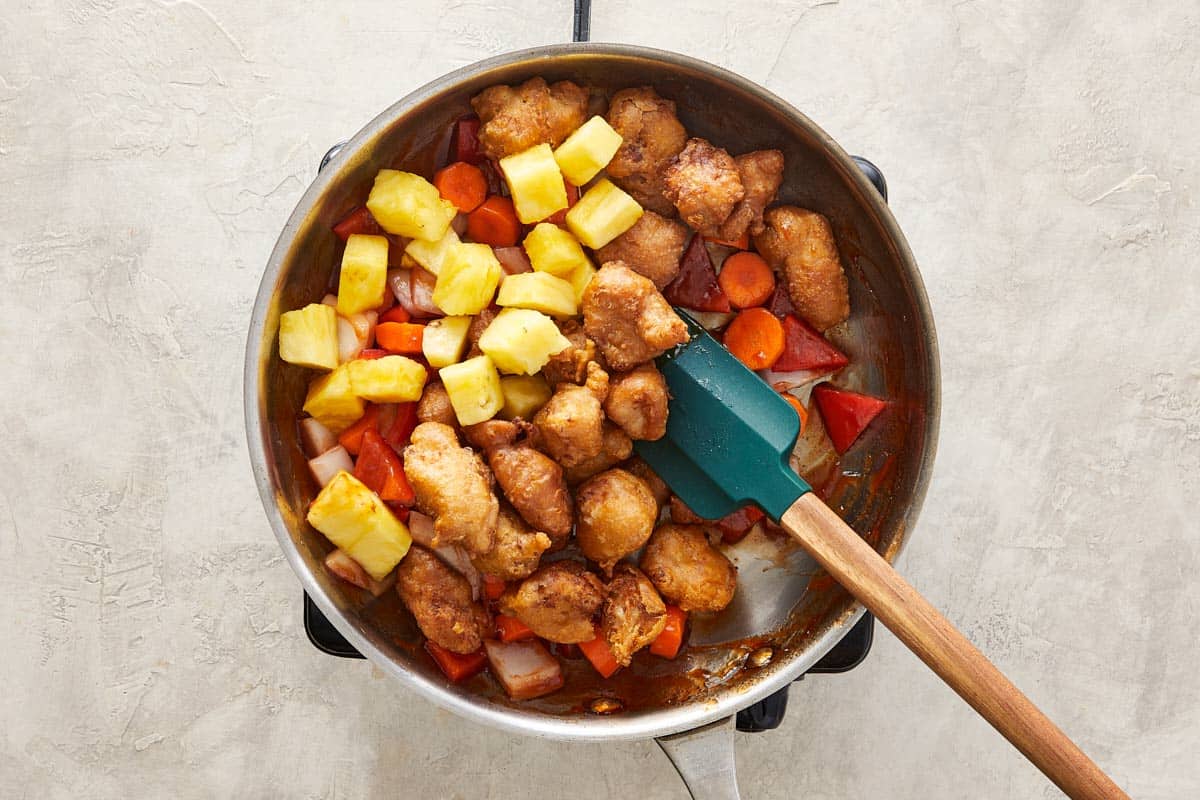
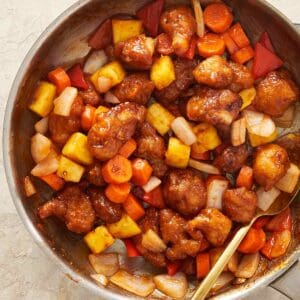
- Veg + Sauce. In a wok add red pepper, carrot, pineapple, and onion; cook briefly, add the sauce, reduce heat, and slowly add the slurry while stirring until thickened.
Want to see how it all comes together? Check out the video in See It In Action for the full step-by-step.
For that takeout-style feel, Fried Rice with Bacon is always a winner. The crispy bacon, the soft eggs and the garlic rice come together in minutes and make the plate feel complete. If you want to add something green without complicating dinner, Cheesy Garlic Roasted Asparagus brings a little freshness and melts beautifully alongside the chicken.
When the meal could use something bright to balance the sauce, Garlicky Herb Red Potato Salad is a great option. The warm potatoes and simple olive oil dressing pair surprisingly well with the tangy chicken. And if you want a dish that leans more toward classic takeout flavors, Sesame Beef Stir Fry, fits perfectly on the table. Quick cooked beef, sesame, a savory sauce and you’re set.
If you’re serving guests or making a slightly bigger spread, you can round out the meal with something fresh like my BLT Balsamic Chicken Avocado Feta Salad or add a little indulgence with Creamy Lemon Parmesan Shrimp or One Pan Honey Lemon Chicken Asparagus. These dishes balance the richness of the sweet and sour sauce without overpowering it.
And for dessert, anything fruity or creamy works well. Peanut Butter and Jam Nutella Banana Blondies are always popular here because they cut nicely into small squares for sharing. If you want something lighter to finish, Strawberry Pancake Trifle is a fun option that you can make ahead of time.
Together, these sides and desserts turn Sweet and Sour Chicken into a full meal that feels generous and easy at the same time.
FAQs
Yes! Thighs stay extra juicy and tender, so they work beautifully in this recipe. Just cut them into bite-sized pieces like you would with breast.
Double frying keeps the coating crisp even after it’s tossed in the sauce. You can skip it, but the chicken will soften faster.
Absolutely. Mix it up a few hours before and keep it in the fridge. Just give it a quick stir before adding it to the wok.
Red bell pepper, carrot, onion, and pineapple are the classics. You can also add zucchini or snap peas if you’d like more crunch.
See It In Action: Step-By-Step
You might also like

Get a free eBook!
Subscribe to Cafe Delites FOR FREE and receive recipes straight into your inbox!
Sweet and Sour Chicken Recipe
Ingredients
For the Crispy Chicken
- 6 oz chicken breasts cut into 1-inch chunks
- 1 tbsp oyster sauce
- 2 tsp light soy sauce
- 1 tsp salt
- 2 tbsp cornflour | cornstarch for the chicken
- ⅔ cup flour
Batter
- ½ cup cornflour | cornstarch for the batter
- 1 tsp water
- 1 tsp baking powder
- ½ cup water
- 1 tsp oil for the batter
- 2 cup oil for frying (peanut, canola, or vegetable oil are all great choices)
For the Stir-Fry & Sauce
- 3 oz red bell pepper cut into triangles
- 6 oz carrot sliced ¼ inch thick
- 2 medium onions cut into one inch chunks
- 6 oz pineapple sliced into ½-inch pieces
- 2 tbsp red vinegar
- 1 tbsp rice vinegar
- 4 tbsp sugar
- ½ tsp salt
Slurry
- ½ tsp cornflour | cornstarch
- 2 tbsp water
Instructions
- In a bowl, toss the chicken chunks with oyster sauce, soy sauce, salt, and 2 tablespoons of the cornstarch place back in the fridge and let sit for 20-30 mins. In a separate small bowl, whisk together the red vinegar, rice vinegar, sugar, and salt for the sauce. Set aside.
- In another bowl, mix the flour, the remaining cornstarch, and the baking powder. Slowly whisk in the ½ cup of water and 1 tsp of oil until the batter is smooth.
- Heat 2 cups of oil in a pot to 350°F (175°C). Coat the marinated chicken pieces in the batter and fry in batches for 3-4 minutes until golden and crispy. Transfer to a paper towel-lined plate. For extra crispiness, fry all the chicken again for one final minute and ensure the oil is drained and place back onto a new paper towel-lined plate.
- Heat a wok or large pan over high heat. Add all the chopped vegetables (bell pepper, carrot and onion) and pineapple and stir-fry for 2 minutes until slightly tender.
- Pour the sauce mixture into the wok and bring it to a simmer. Mix the cornstarch and water together to make the slurry and add it to the wok, stir constantly until the sauce thickens. Throw in the crispy chicken, toss everything to coat, and serve immediately.
Notes
- Double Frying: That quick second fry is what makes the chicken extra crisp—don’t skip it!
- Pineapple Tip: Fresh pineapple works best, but canned can save time. Just drain well so the sauce doesn’t get watery.
- Veggie Swap: Feel free to add zucchini, snap peas, or broccoli if you want extra crunch.
- Make Ahead: You can fry the chicken earlier in the day and reheat it in the sauce right before serving.
Nutrition
Nutrition information is automatically calculated, so should only be used as an approximation.


Made this for the family tonight and there wasn’t a single nugget left! The instructions were super easy to follow, and I loved the tip about using cornstarch for that extra crunch. Thank you for another winner, Karina!
Hey Karina. First of all, I want to say thank you for all your wonderful recipes. I have made almost 40 of them and they all turned out delicious! You are amazing and your taste profile is spot on. Just wanted to add a comment about this recipe. I thought the marinade salt could be cut down to 1/2 tsp. The chicken was a little on the salty side. The print recipe was missing the 1/3 cup of Ketchup (I had to watch the video to discover. The video reads the wrong amount as well). Also the 2/3 flour under the chicken marinade should be under the batter section (I almost added it in marinade). Just wanted to let you know but otherwise the chicken came out great!
Hi Ally, thank you so much for the message and reaching out. I will remake this and correct the errors. Xx
I cannot find red vinegar. What can I substitute this with?
Hi Ally, No red vinegar? No problem! You can just use rice vinegar or white vinegar instead. Easy! Xx
Delicious, double frying the chicken makes all the difference!