This post may contain affiliate links. Please read our disclosure policy.
Craving fresh, homemade bread? This Easy Bread Recipe will have you baking artisan-level loaves with a golden brown, crackling crust—no kneading required! That’s right! No special equipment, stand mixers, or dough hooks needed for this easy bread recipe. Imagine that perfect texture as you cut into the loaf: the bread resists just enough under the knife, yielding a satisfying crunch. Bread lovers will adore every bubble and pocket, spreading generous Garlic Butter on warm slices fresh from the oven. In less than three hours, you’ll have this easy bread recipe made from scratch and ready to serve.
Why This Bread Recipe Stands Apart
It looks too good to be true, I know. Fluffy, crusty homemade bread with no effort? No way! But ever since I discovered this truly easy bread recipe a few years ago, I’ve been baking bread just about every week. Now you will too! Beginner bakers rejoice: NO KNEAD to feel intimidated! The mystery happening at night behind the closed doors of a bakery is ready to be brought to light.
You’ll have the choice of dipping crusty bread pieces into a hot bowl of Chicken Soup, Vegetable Soup, Chili or the glaze from this Maple Glazed Ham for bread soaked in wholesome flavors, or turning your freshly baked artisan bread into Cheesy Garlic Bread. With this easy bread recipe, you’ll experience the joy of baking without the fuss, and every loaf will be a testament to your newfound bread-making prowess.
For something fun, make my Focaccia Pizza. Trust me, once you try it, you never go back.
Easy Bread Recipe: Key Ingredients
The secret to this effortless and easy bread recipe lies in its key ingredients. Each one brings something unique to create a perfectly textured, flavorful loaf. From the protein-packed bread flour to the rapid-rise yeast, every component plays a crucial role. Let’s dive into what makes this easy bread recipe and truly exceptional.
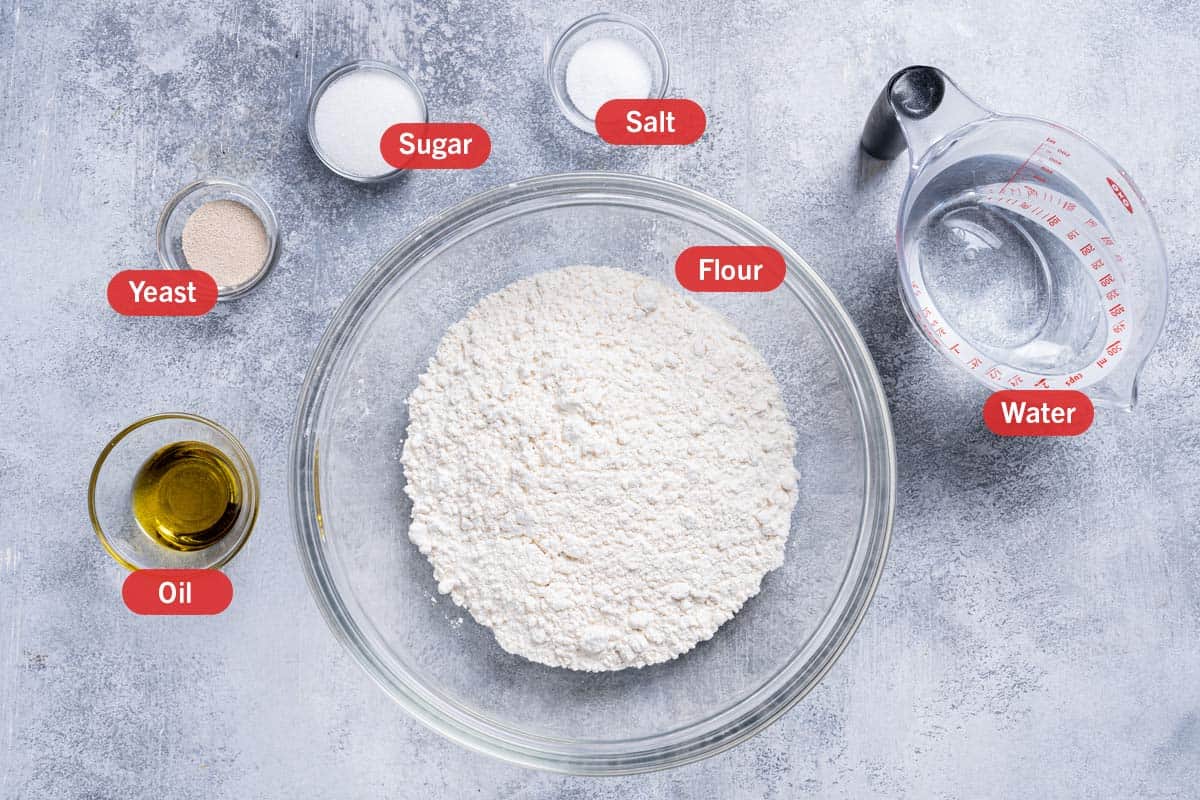
- Flour: For the best results, use bread flour as it contains higher protein content, which enhances gluten formation and gives your bread a chewy, airy texture. However, if you prefer a softer crumb, all-purpose flour works perfectly too. Look for flour that’s fresh and free of lumps for the best texture.
- Warm Water: Ensure your water is warm, but not hot—ideally around 110°F (43°C). Too hot, and it may kill the yeast; too cold, and it won’t activate properly. A quick check with a kitchen thermometer or a touch test (warm but comfortable) will do the trick!
- Dried Yeast: Use instant or rapid-rise yeast for convenience and quicker rising times, just as we did for these Soft Dinner Rolls. Make sure the yeast is fresh—check the expiration date on the packet. Store unused yeast in an airtight container in a cool, dry place to keep it potent.
- Olive Oil: Oil adds a rich, nutty flavor to your bread and helps keep the crumb moist. Use a good-quality olive oil for the best taste. If you’re out of olive oil, feel free to substitute with vegetable oil, but keep in mind the flavor will be slightly different.
*Note: Please see Recipe Card at the bottom for a full list of ingredients and measurements.
Additions And Substitutions
When it comes to baking Easy Artisan Bread, versatility is your best friend. Even if you’re looking to elevate the flavors, there are plenty of delightful additions that will keep your bread delicious and satisfying. Let’s explore how you can make this easy bread recipe work with what you have on hand, while still achieving that perfect crust and fluffy crumb.
- Add Seeds: Enhance the texture and flavor by sprinkling sesame seeds, sunflower seeds, or poppy seeds into the dough. Not only do they add a pleasant crunch, but they also boost the nutritional value of your bread.
- Incorporate Herbs: Fresh or dried herbs like rosemary, thyme, or oregano can transform your bread into a fragrant masterpiece. Mix them into the dough or sprinkle them on top before baking for a delightful aroma.
- Cheese Lovers: Fold in some shredded cheese, such as cheddar, Parmesan, or Gruyère, to create a cheesy twist on your artisan bread. The cheese melts into the dough, creating pockets of gooey goodness in every bite. Ever thought of using this bread to make Pull-Apart Stuffed Bread with Chipotle Carne Asada?
- Garlic and Onion: Minced garlic or finely chopped onion can add a burst of savory flavor to your bread. Sauté them lightly before adding to the dough for an even richer taste.
- Olives and Sun-Dried Tomatoes: Chopped olives or sun-dried tomatoes bring a Mediterranean flair to your bread. They add a tangy, savory note that complements the rustic crust perfectly.
*Note: Remember, these additions should be incorporated gently into the dough to ensure they enhance rather than overpower the classic bread flavors.
Bread Recipe Made Easy: Step-By-Step Guide
Ready to bake the perfect Artisan Bread? Follow these simple steps with images to guide you through the process. You’ll achieve a golden, crackling loaf with a tender, chewy interior that’s sure to impress and delight. Let’s dive in and create an easy bread recipe that will become a staple in your kitchen!
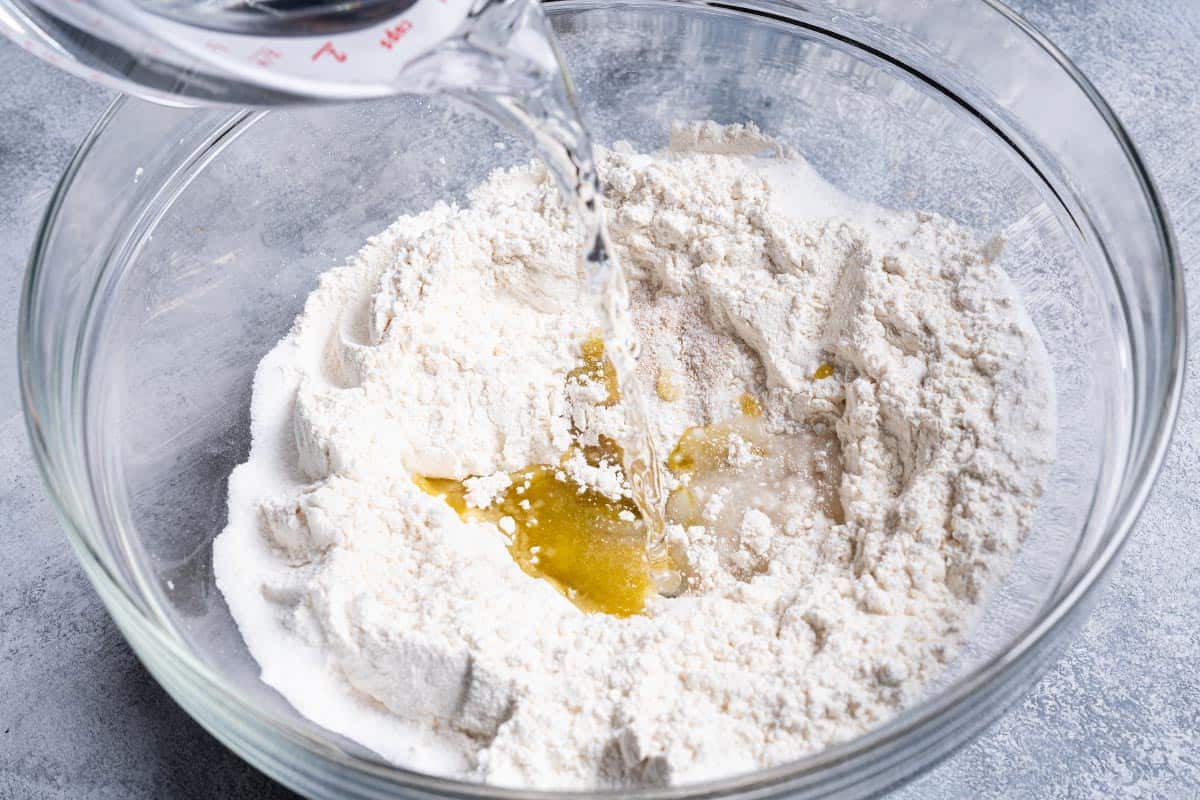
- Combine Ingredients: In a large bowl, mix flour, sugar, yeast, and salt. Add water and oil, mixing until the dough is wet, sticky, and shaggy.
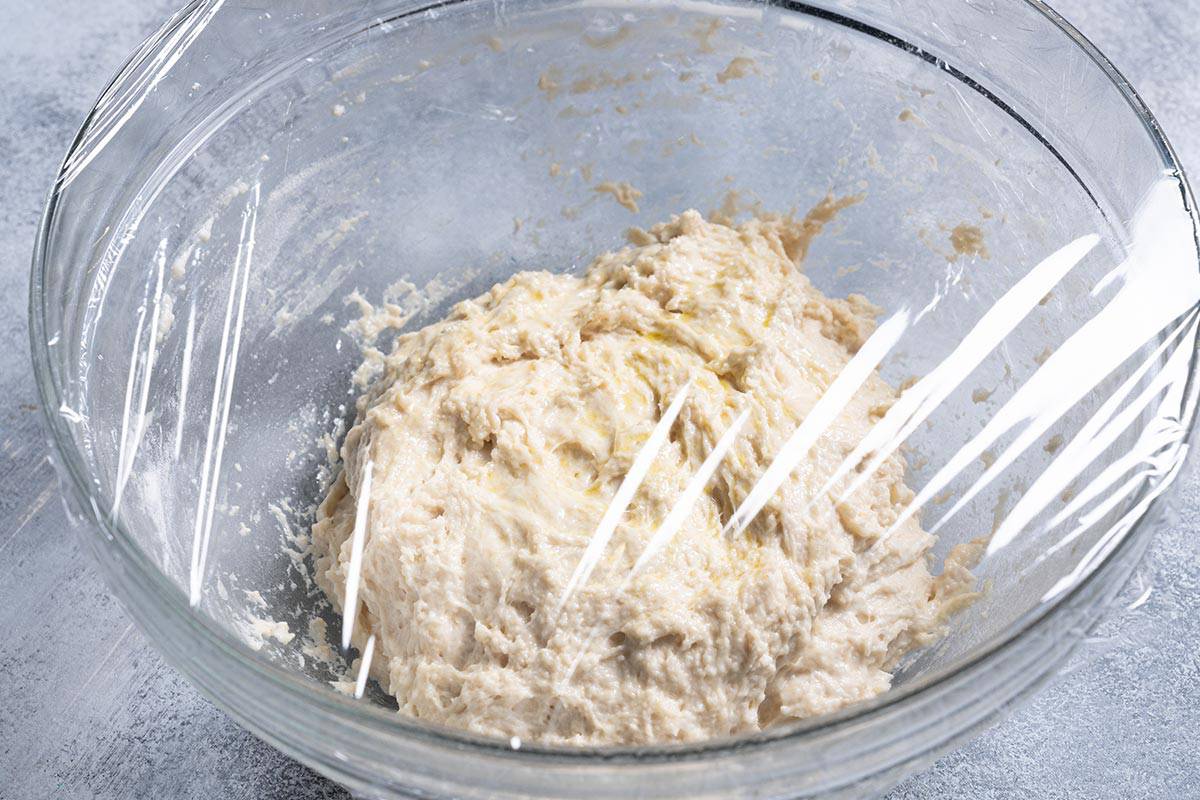
- Spray and Cover: Lightly spray the top with cooking oil. Cover with plastic wrap and place a dry tea towel over the top.
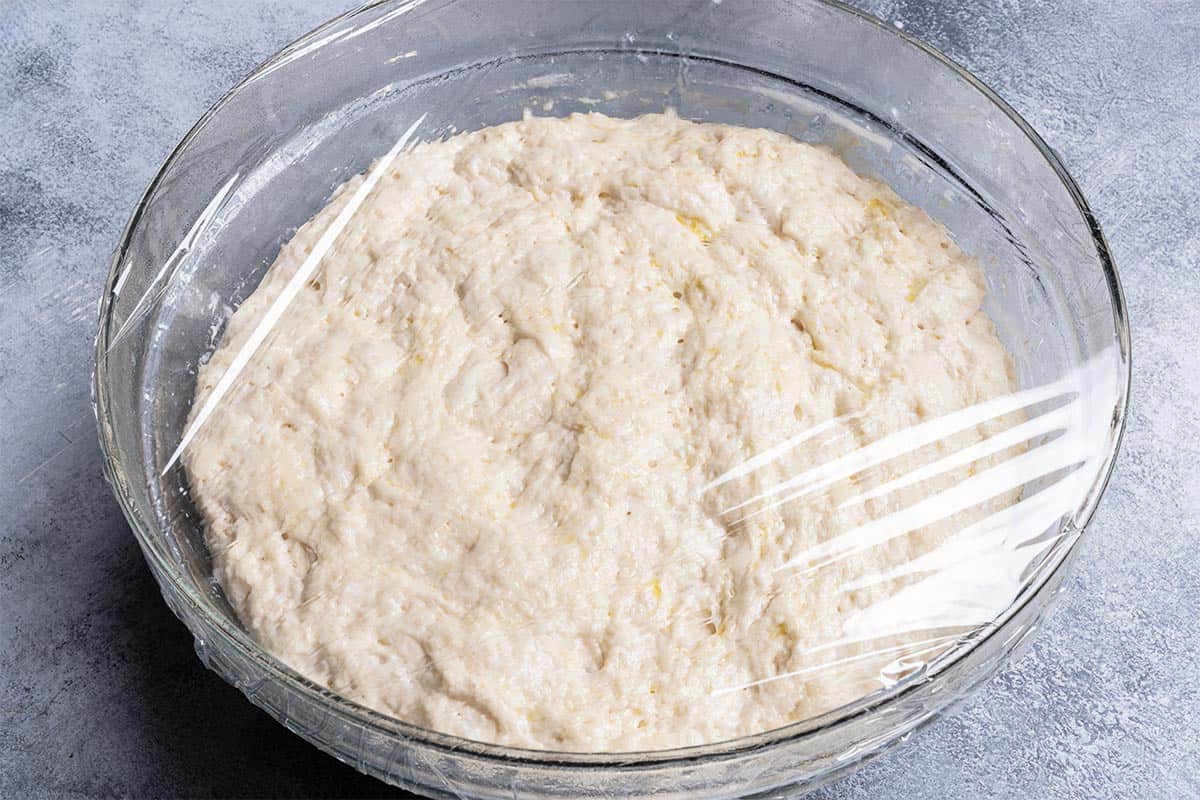
- Let Dough Rise: Leave in a warm, draft-free place for 2-3 hours until doubled in size. The dough should have small holes or bubbles and be wobbly like jelly.
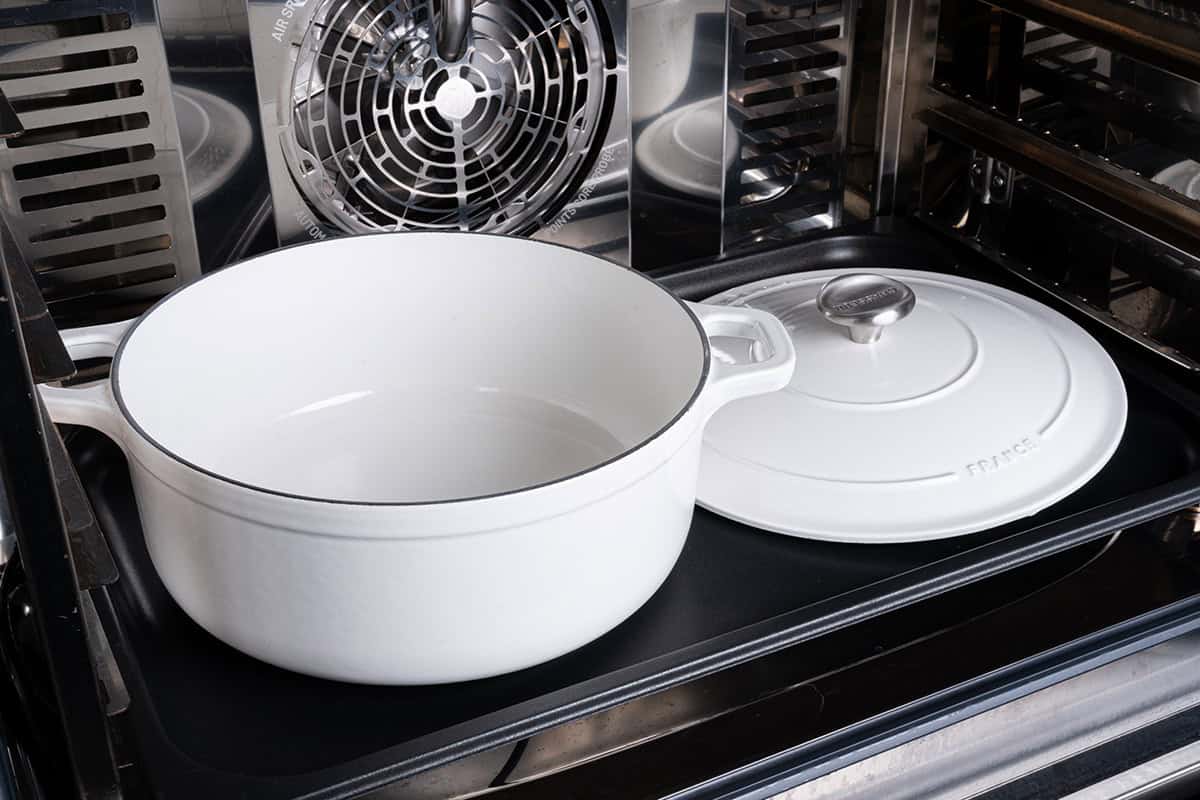
- Preheat Oven: Place a large Dutch oven or heavy-based pot in the oven with the lid on. Preheat to 450°F (230°C) for 30 minutes before baking.

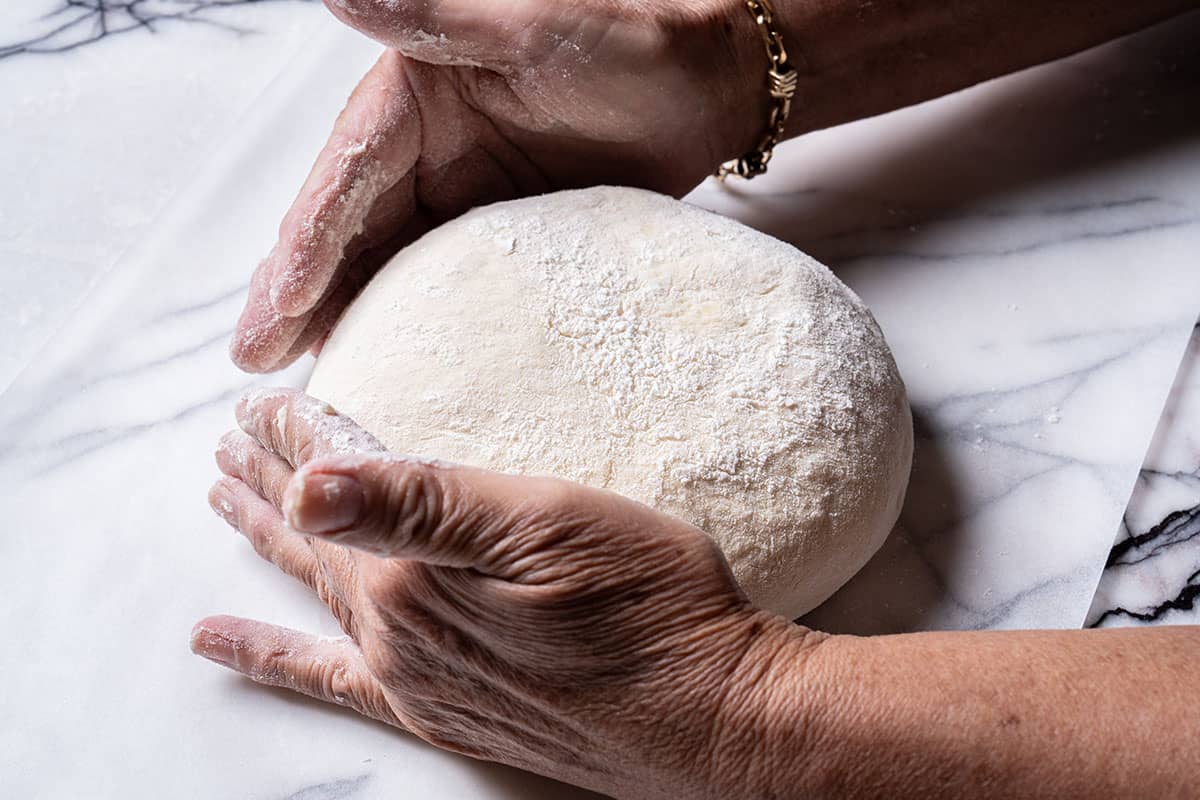
- Prepare Work Surface: Lightly flour your work surface and plastic spatula.
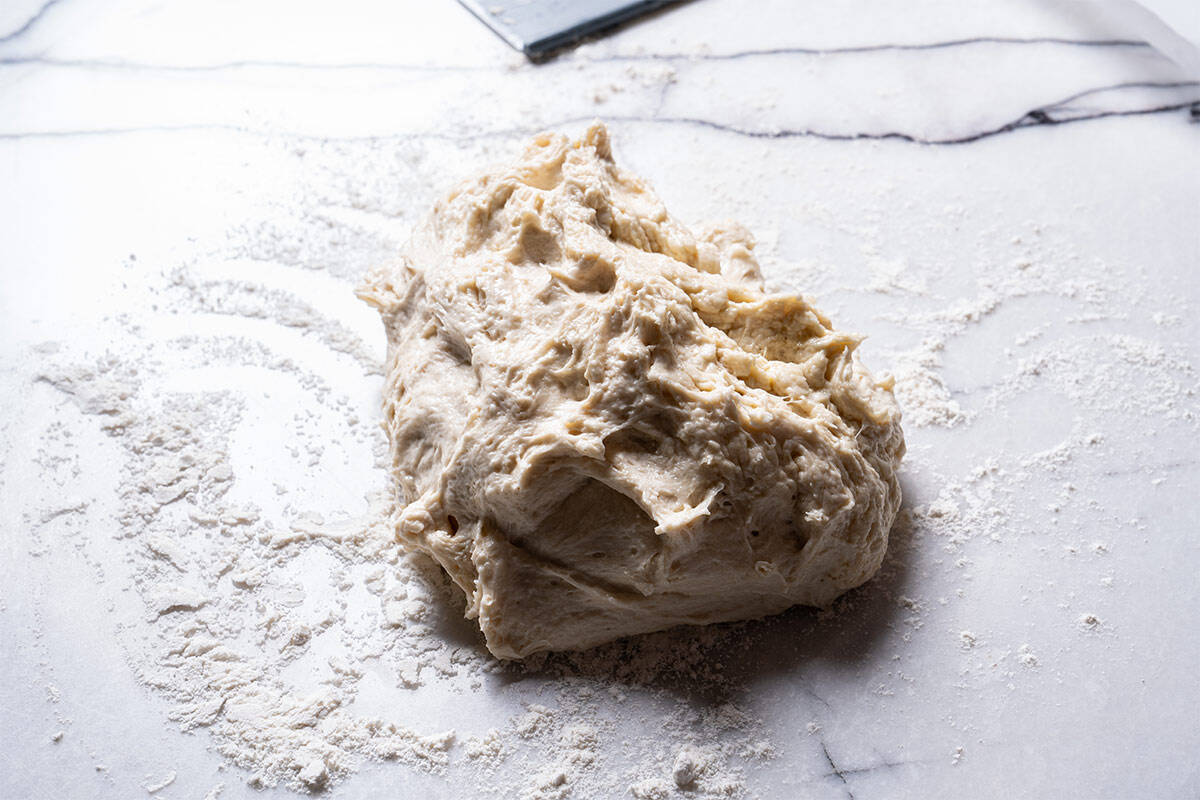
- Scrape Dough: Scrape the dough out of the bowl onto the floured surface with a spatula.

- Fold Dough: Sprinkle the top of the dough with flour and fold it over itself about 5-6 times using the spatula. Roughly shape it into a round form.
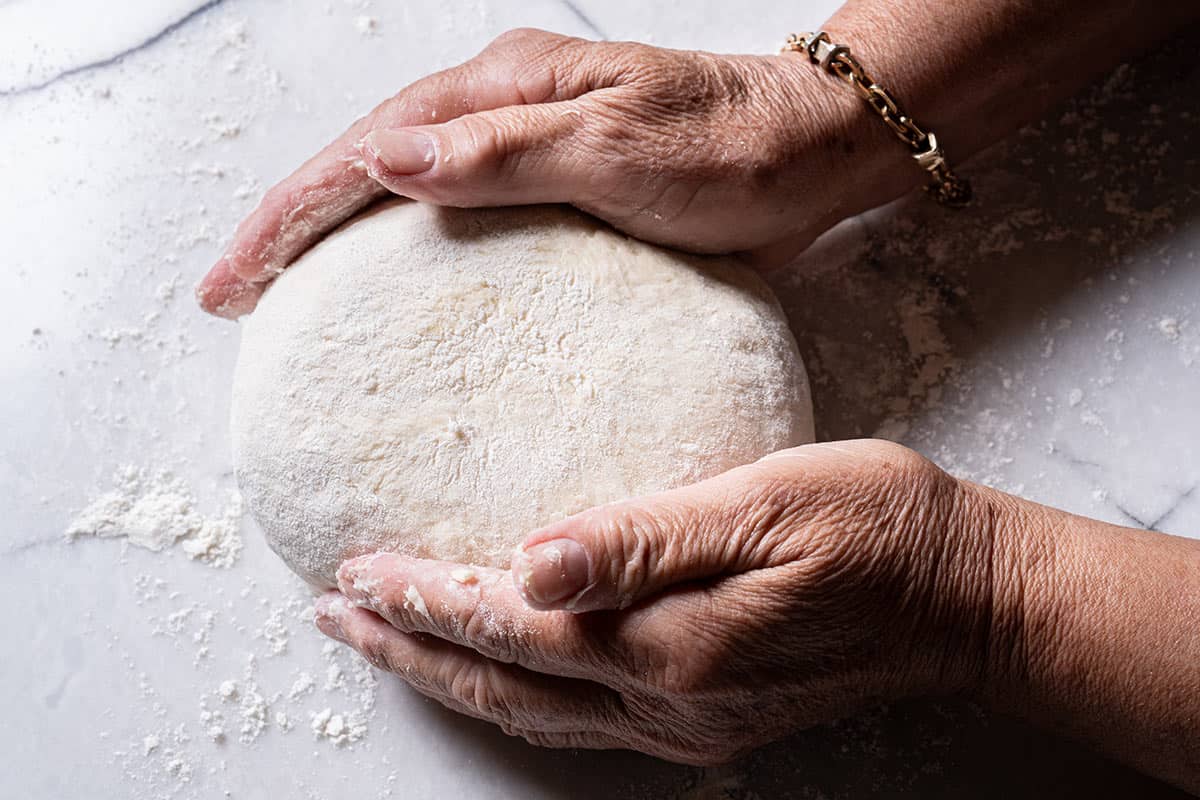
- Form Shape: Roughly form a round shape with the dough.
- Transfer to Parchment: Measure out a large piece of parchment paper. Roll the dough onto the paper, smooth side up, and reshape if needed.
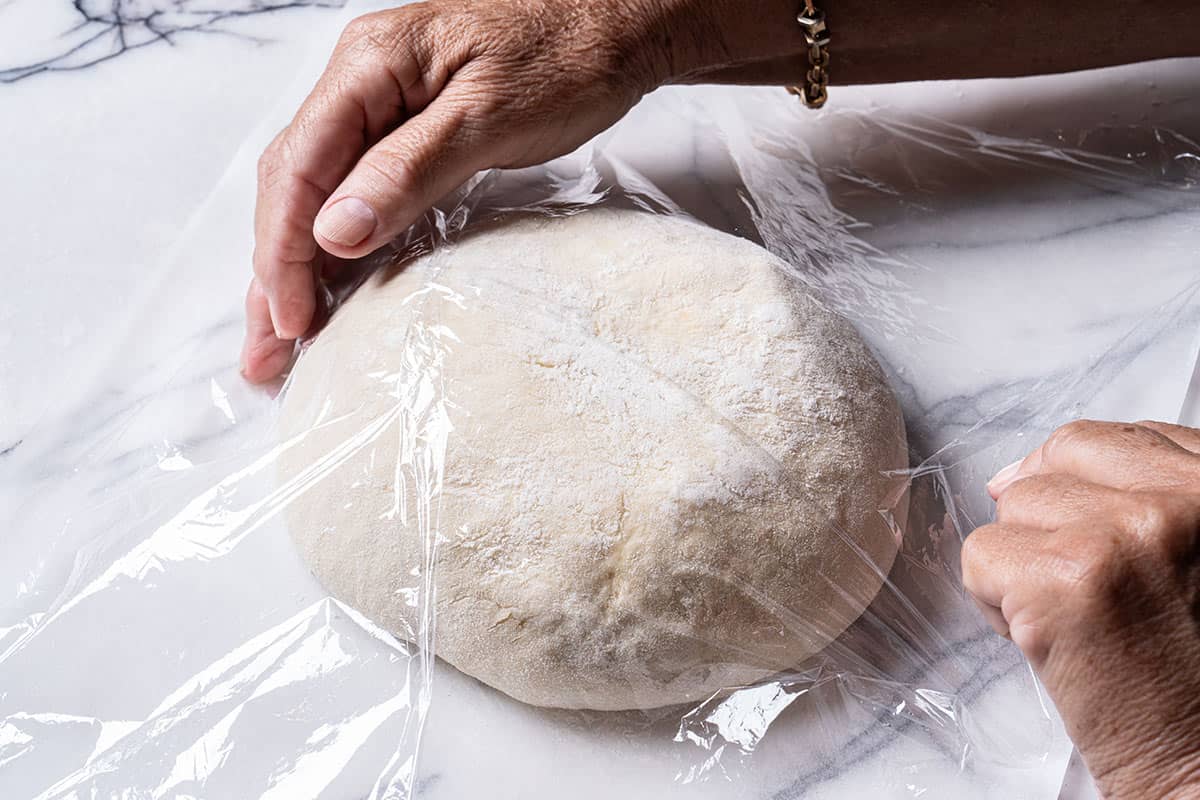
- Rest Dough: Loosely cover the dough with plastic wrap and let it rest while the oven preheats.
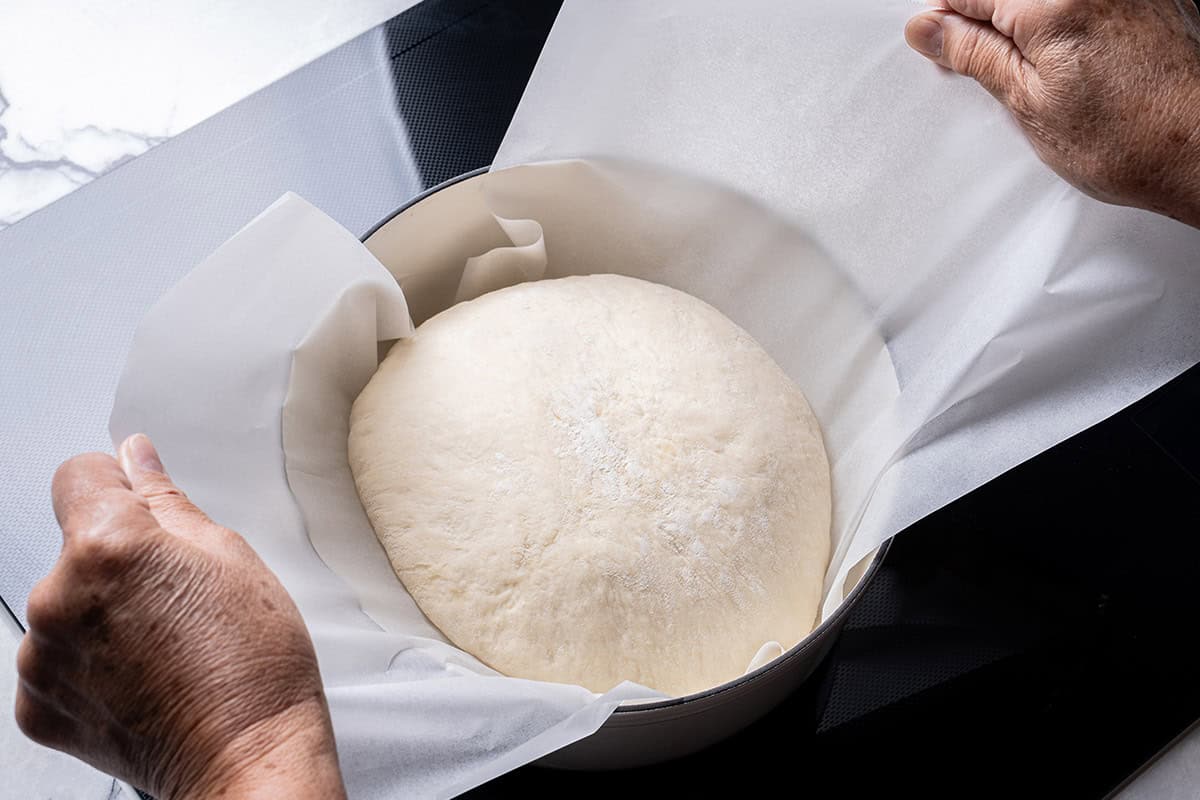
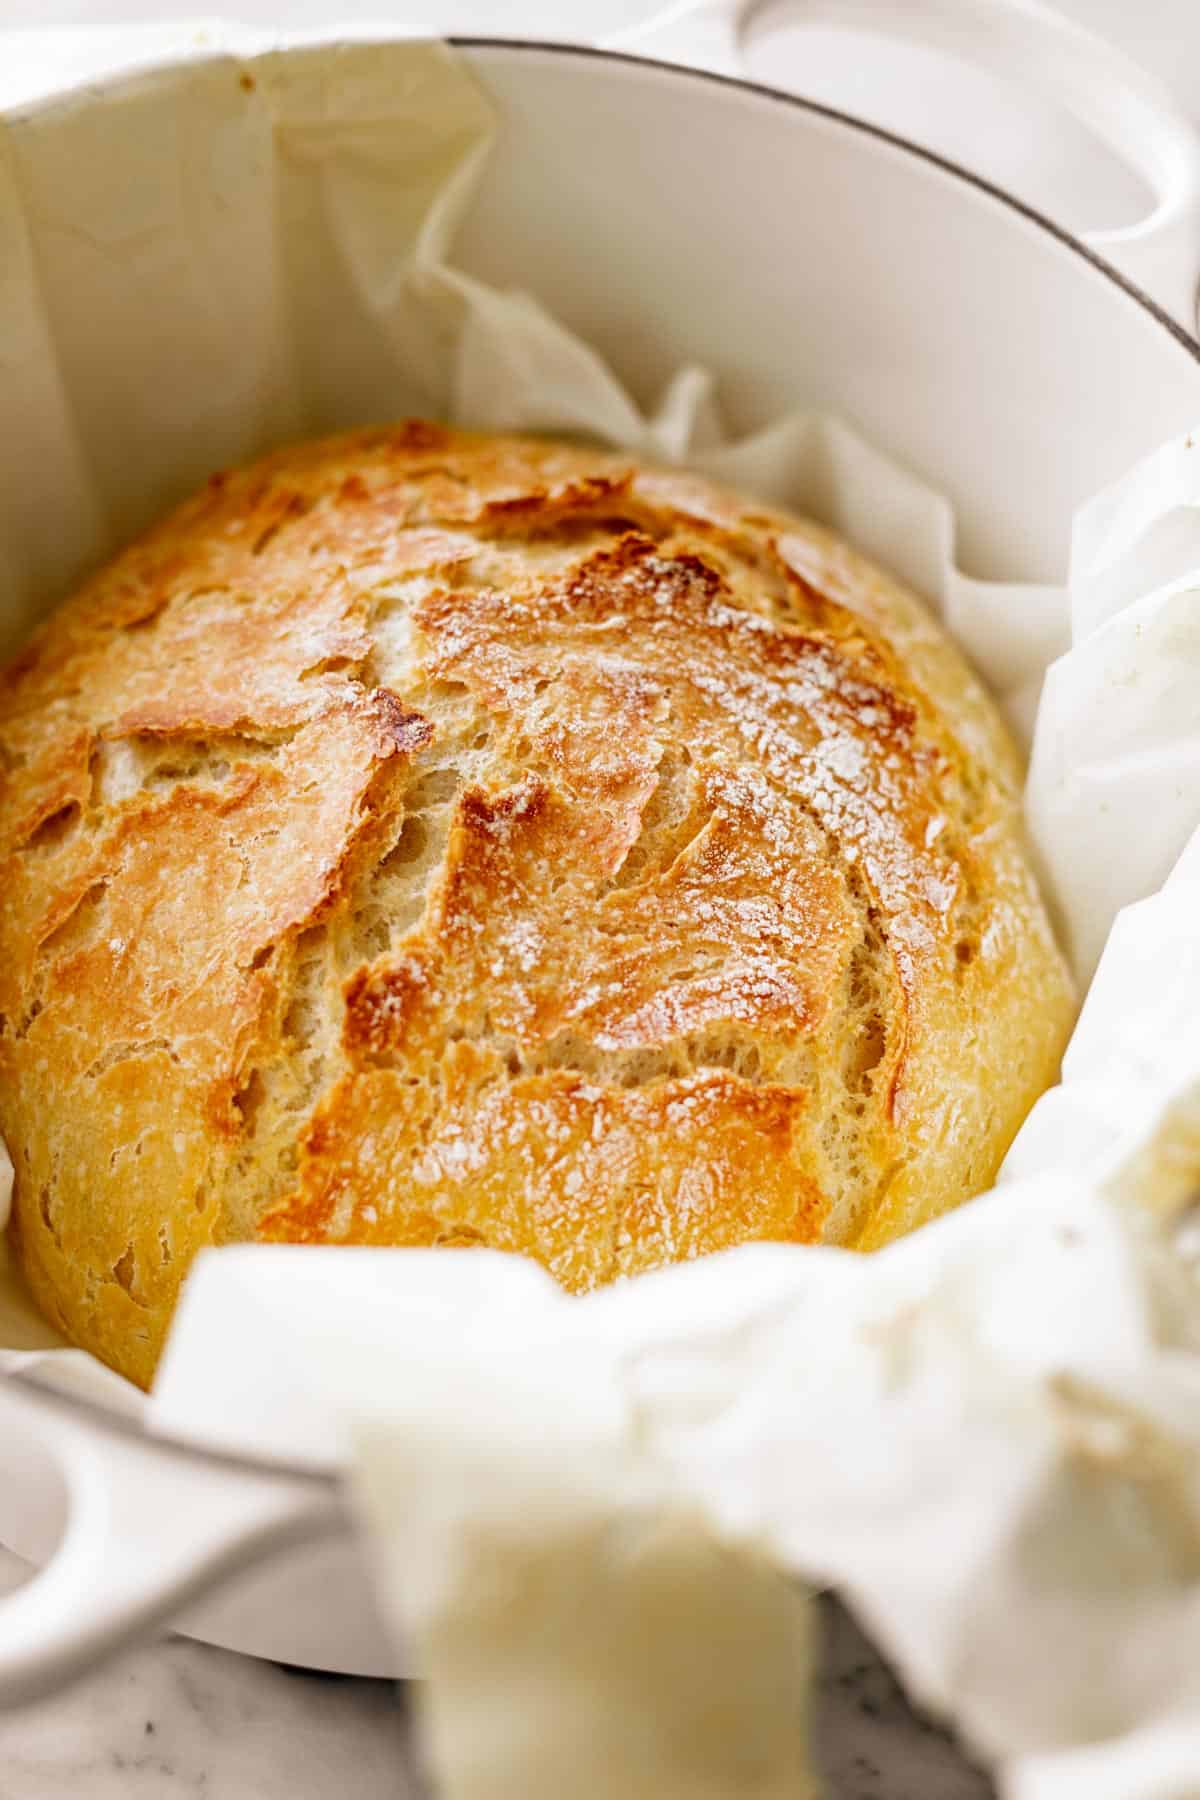
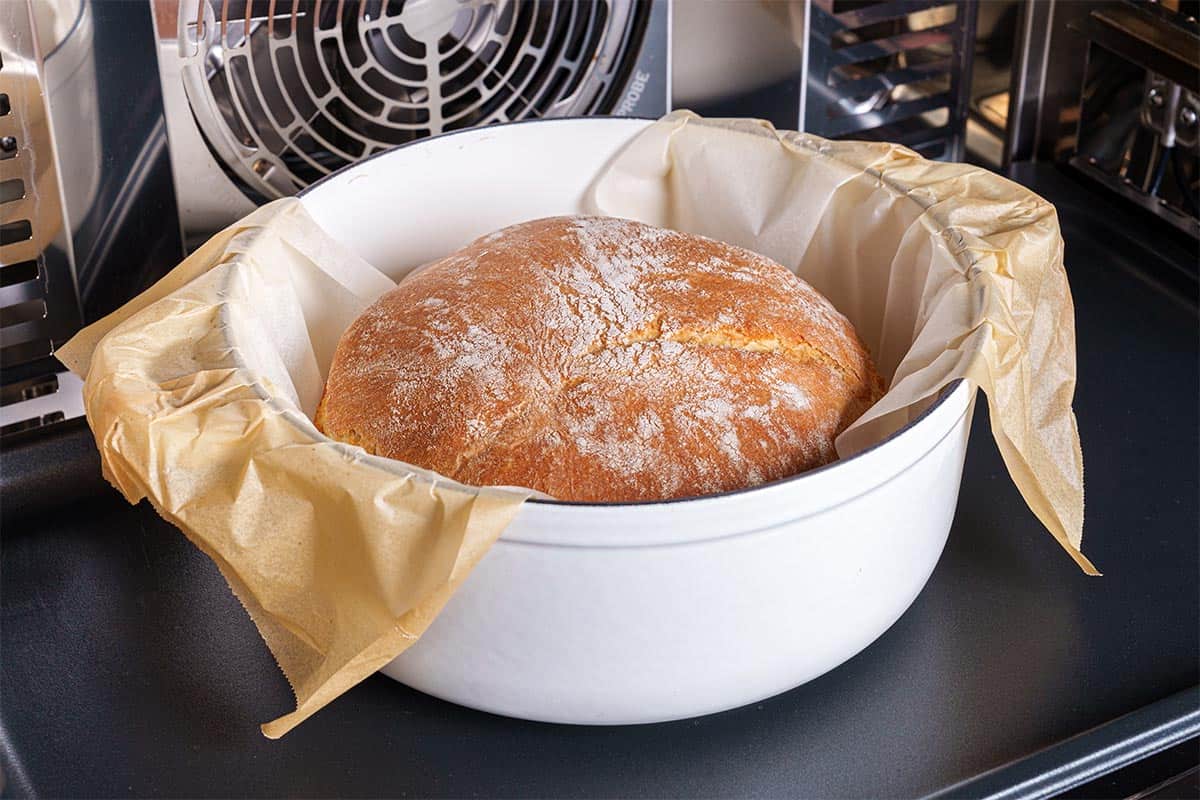
- Transfer to Pot: Carefully remove the hot Dutch oven from the oven using oven mitts. Pick up the dough by grabbing the parchment paper from each end and place it into the pot.
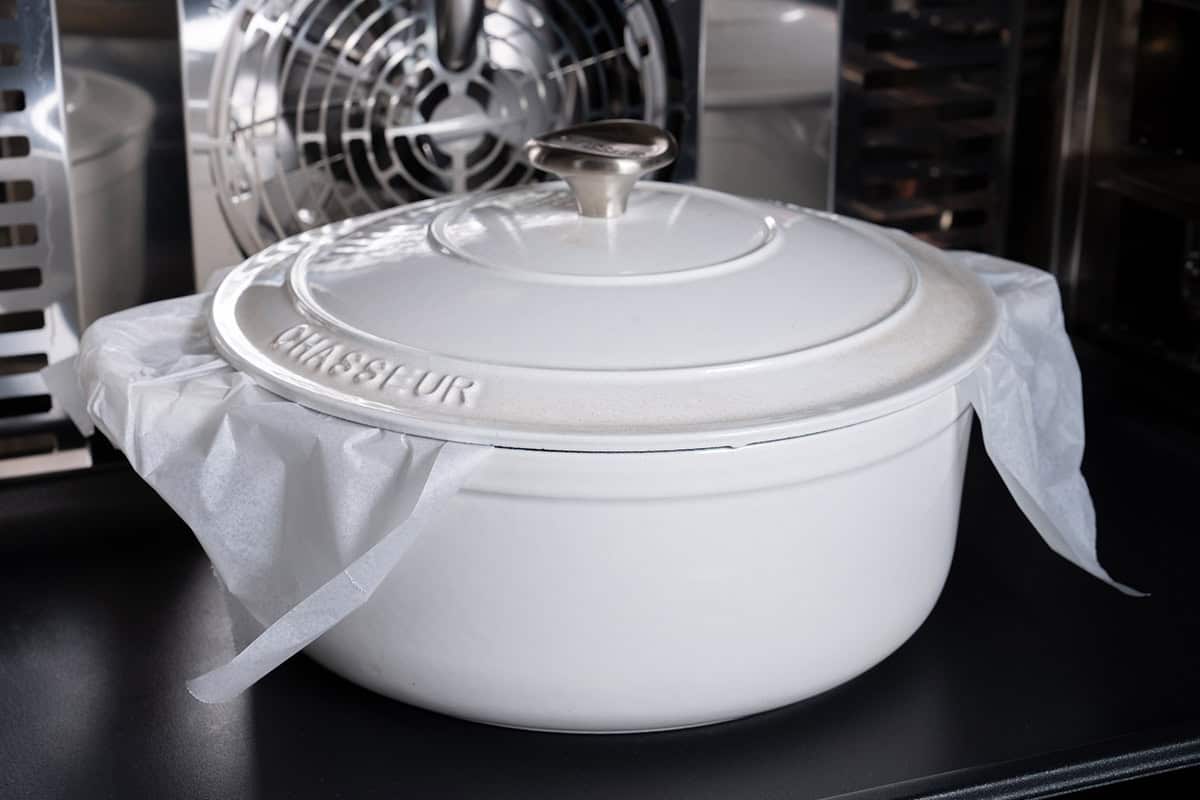
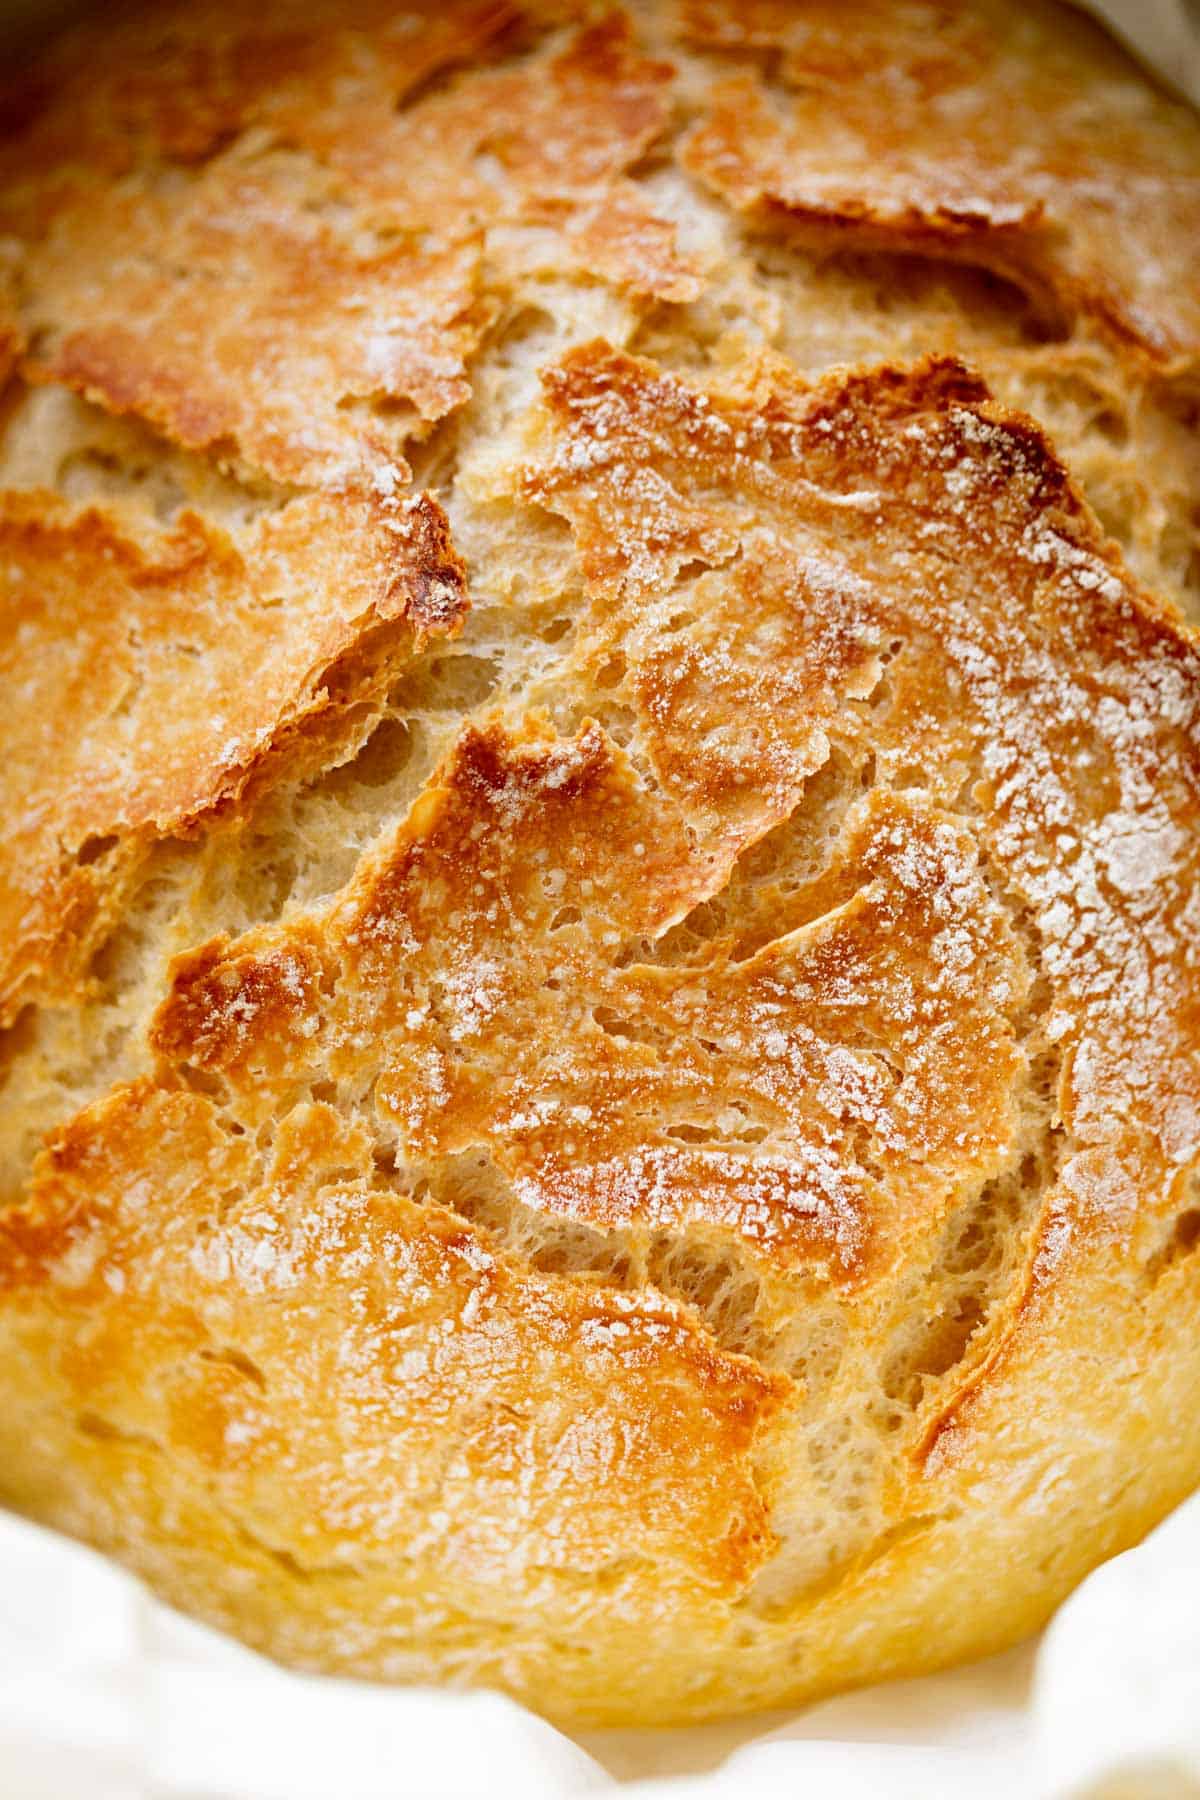
- Bake Bread: Cover with the lid and bake for 30 minutes. Remove the lid and bake for an additional 12-15 minutes until the loaf is beautifully golden brown.
- Cool Bread: Transfer to a wire rack to cool for 10 minutes before slicing.
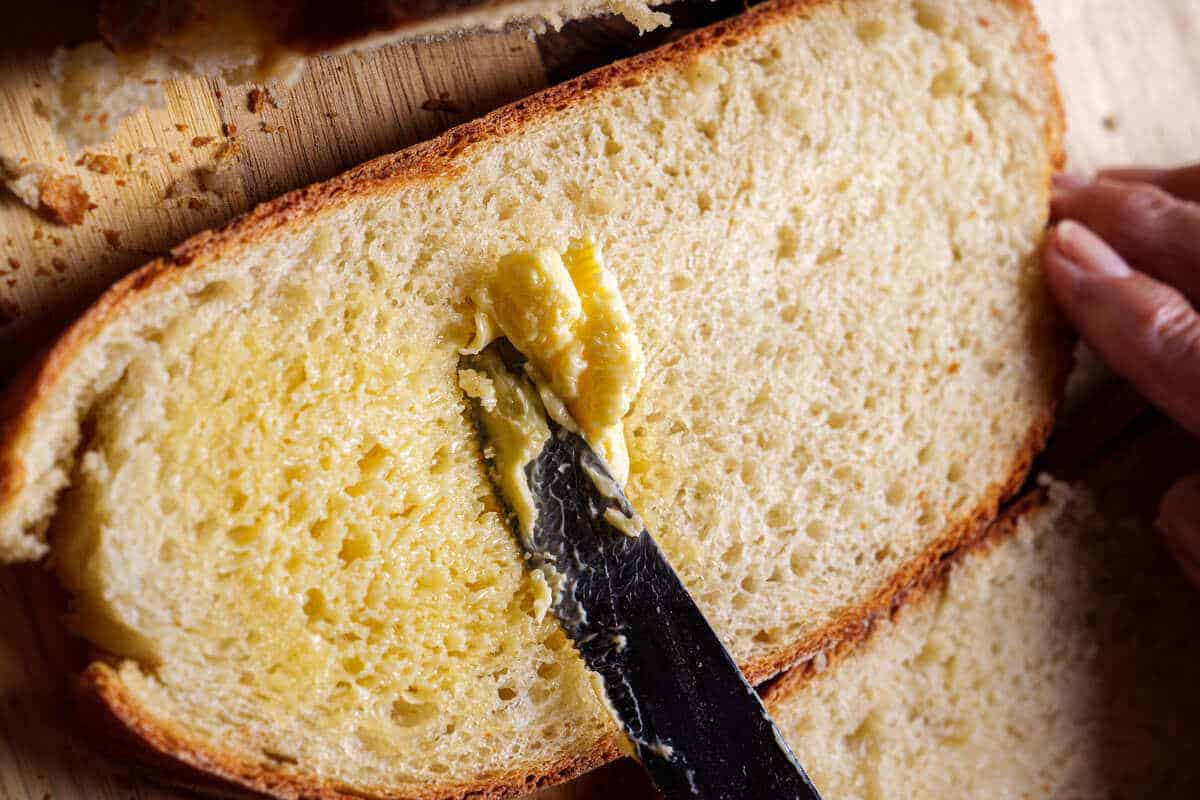
- Enjoy: Slice the bread and enjoy it plain or with a spread of butter or Nutella.
Thank you for baking with us! We hope you enjoy your freshly baked Artisan Bread and this easy bread recipe. While you wait for it to cool, why not explore more delicious recipes on our blog? Check out our Creamy Garlic Tuscan Shrimp for a rich and flavorful dinner idea, or spread over it some of this tasty Sugar-Free Nutella Spread for a delightful snack. You can also use it as bread for this Creamy Beef Stroganoff With Mushrooms, or pair it with a cup of Nutella Hot Chocolate to start your day and spread it on some Blueberry Sauce.
Recipe FAQ’s
Yes, you can use all-purpose flour in this easy bread recipe. It will produce a slightly softer texture compared to bread flour, which has higher protein content and creates more gluten.
Yes, preheating the Dutch oven for this easy bread recipe ensures the dough is placed in a hot environment, which helps to create a crusty exterior.
Yes, you can freeze the bread. Let it cool completely, then wrap it tightly in plastic wrap and place it in a freezer bag. It will keep for up to 3 months.
Unfortunately, you shouldn’t freeze the dough from this easy bread recipe as it could kill the yeast.
You might also like


Get a free eBook!
Subscribe to Cafe Delites FOR FREE and receive recipes straight into your inbox!
No Knead Artisan Bread
Ingredients
- 3 cups bread flour or plain/all purpose
- 1 tablespoon white granulated sugar
- 2 teaspoons dried yeast instant or rapid rise
- 1 1/2 teaspoons salt
- 1 1/2 cups warm water
- 1 tablespoon olive oil
Instructions
- Combine flour, sugar, yeast and salt in a large bowl. Add water and oil, mixing to incorporate all of the ingredients together. Dough will be wet, sticky and shaggy.
- Lightly spray the top with cooking oil spray. Cover with plastic wrap and place a dry tea towel over the top.
- Leave in a warm, draft-free place for 2-3 hours, until doubled in size. Dough will have a lot of little holes or bubbles and be wobbly like jelly.
- Place a large (10-inch or 26cm) dutch oven or heavy based pot in the oven with a lid. Preheat oven to 450°F (230°C) 30 minutes before baking.
- Lightly flour work surface and plastic spatula with up to 1 tablespoon flour. Scrape dough out of bowl onto work surface with spatula. Sprinkle the top of dough with a large pinch of flour and fold it over on itself with the spatula (about 5-6 folds). Roughly form a round shape.
- Measure out a large piece of parchment paper, large enough to transfer the dough into the pot. Place paper next to the dough and roll dough onto the paper, smooth side up. Carefully move it to the centre of the paper and reshape if needed, or shake pan a couple of times to evenly distribute dough. (It will even out while baking.)
- Loosely cover with plastic wrap and let rest while oven is preheating.
- Use oven mitts to carefully remove hot dutch oven from oven. Grab the parchment paper from each end to pick up the dough and transfer it into the pot.
- Cover with lid and bake for 30 minutes, then remove lid and bake for an additional 12-15 minutes, until loaf is beautifully golden browned.
- Transfer to a wire rack to cool for 10 minutes before slicing.
Notes
Nutrition
Nutrition information is automatically calculated, so should only be used as an approximation.


Yet to taste it. It’s got 2 minuets left in the oven. Looks sooooo yummy and my house smells amazing. Next time I’ll be putting cheese and Italian seasoning in it