This post may contain affiliate links. Please read our disclosure policy.
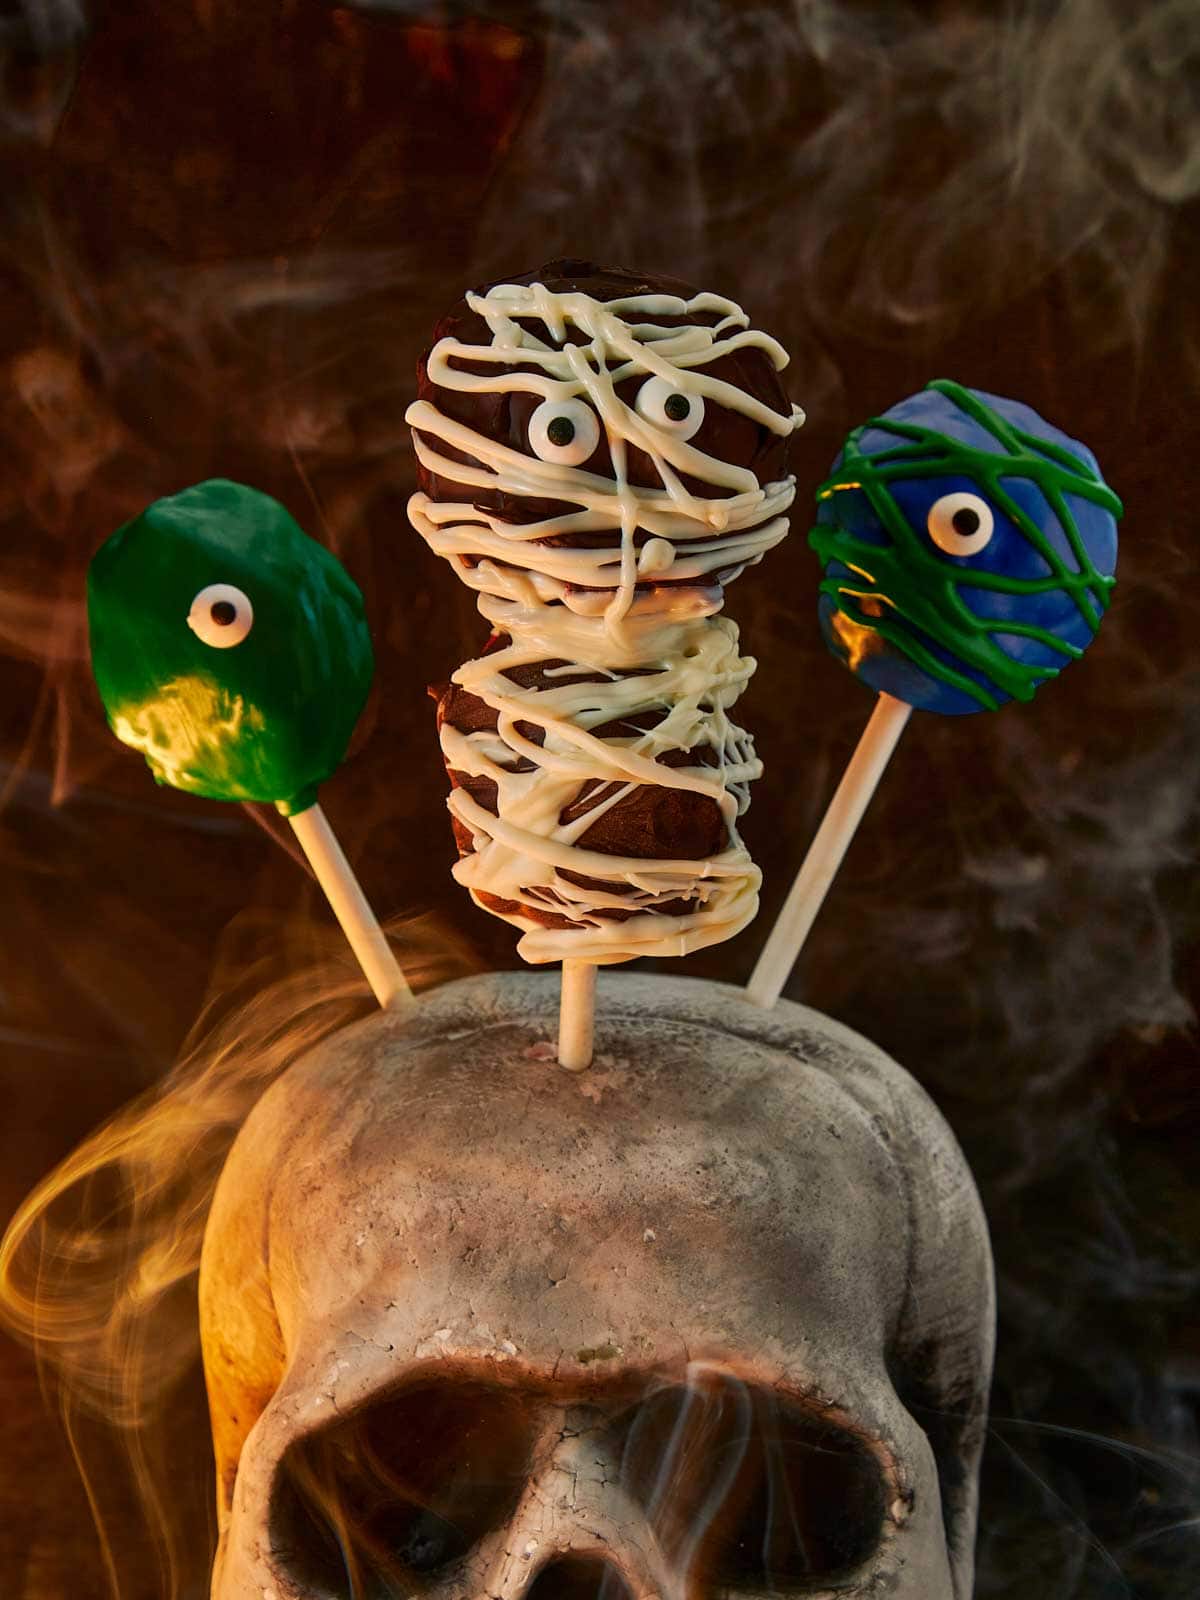
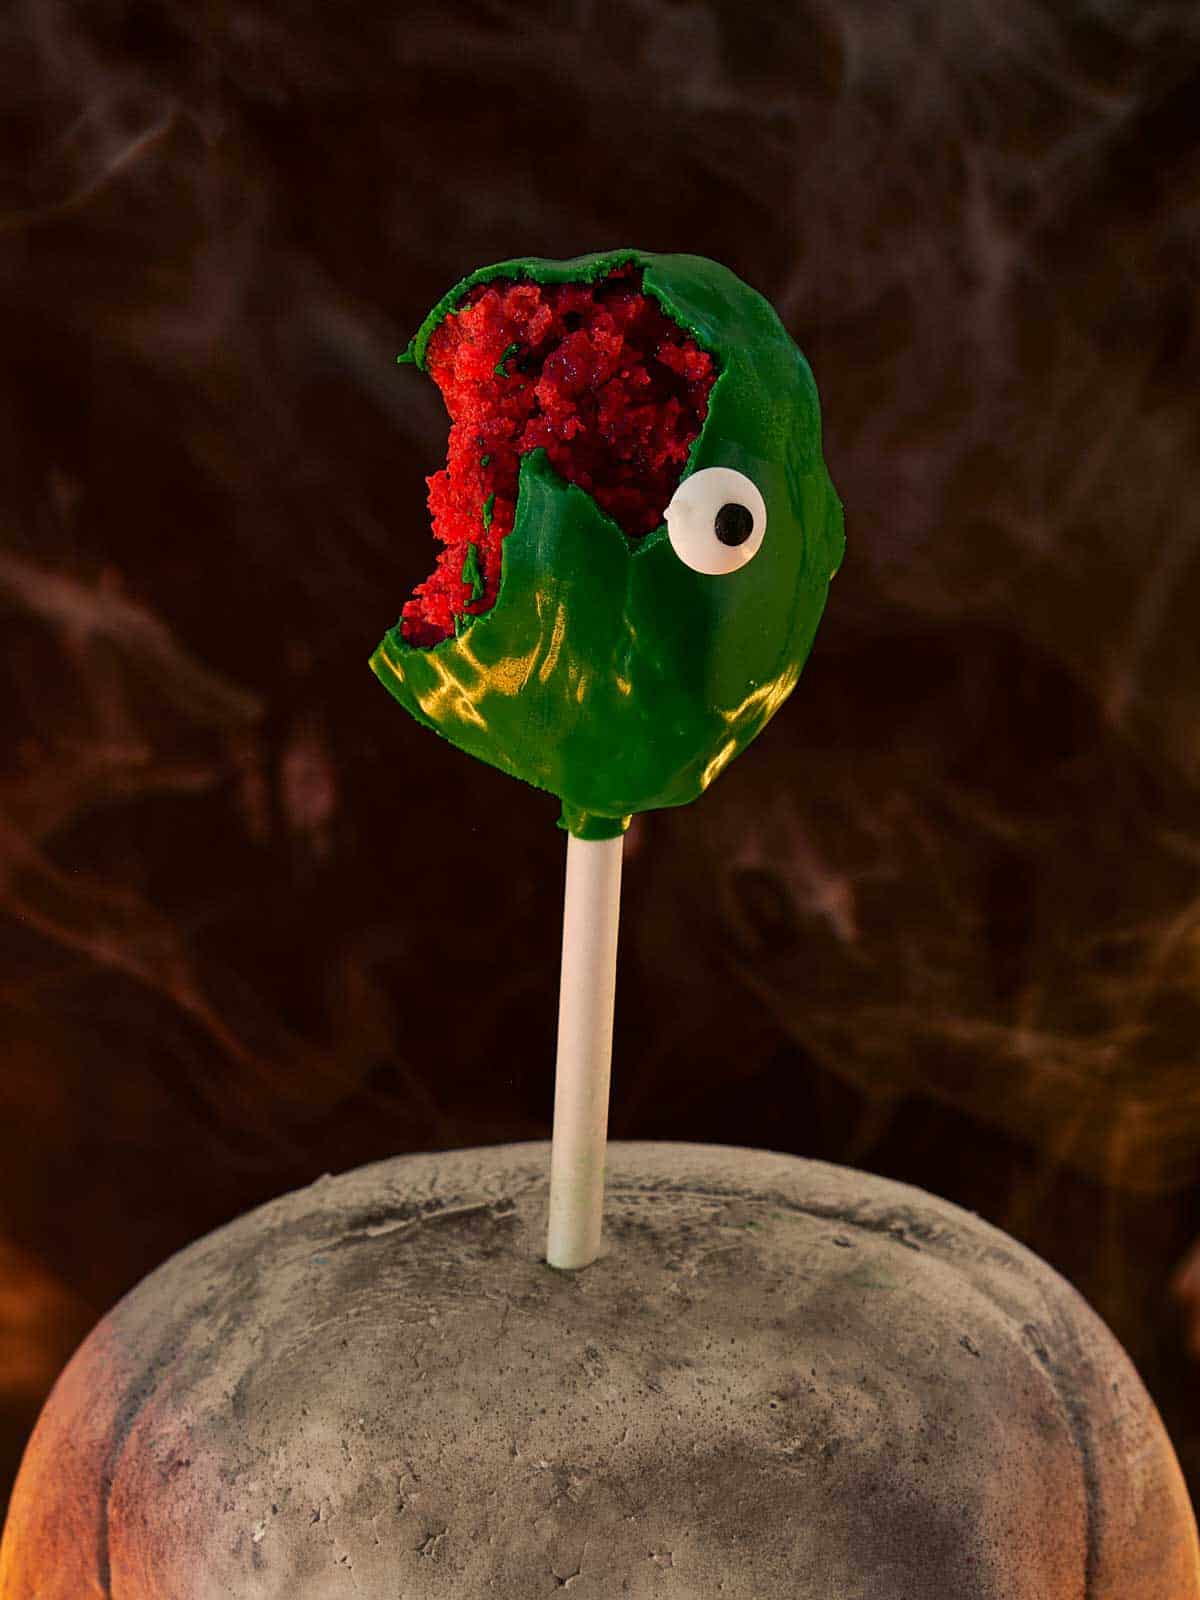
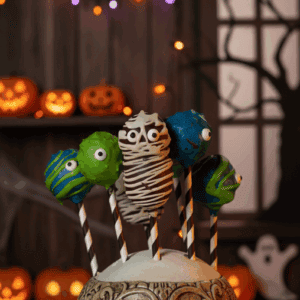
Forget store-bought Halloween sweets. These Red Velvet Monster Cake Pops are in a league of their own. Soft, buttery red velvet cake blended with fluffy vanilla frosting, then coated in a glossy layer of chocolate and topped with candy eyes or colorful drizzle. Each bite is pure decadence: rich, moist, and completely addictive.
They’re fun to make, even more fun to decorate, and guaranteed to be the first thing gone from your Halloween dessert table.
What Makes These Monsters So Irresistible
These Red Velvet Monster Cake Pops strike the perfect balance between rich, fudgy texture and playful Halloween fun. The homemade red velvet cake gives every bite that deep cocoa flavor and soft crumb, while the creamy frosting keeps everything moist and smooth inside. Dipping them in chocolate adds that satisfying snap, and decorating turns them into a creative (and delicious) activity for all ages.
If you’re planning a Halloween dessert spread, try pairing them with something pumpkin-spiced like Soft Pumpkin Chocolate Chip Cookies, a beautiful Pumpkin Cheesecake, or go classic with Pumpkin Bread (Halloween Edition), both perfect for rounding out a spooky-sweet night.
Ingredients That Bring Monsters To Life
Just a handful of simple ingredients come together to create these fudgy, chocolate-dipped monster pops. Here’s what you’ll need to bring them to life:
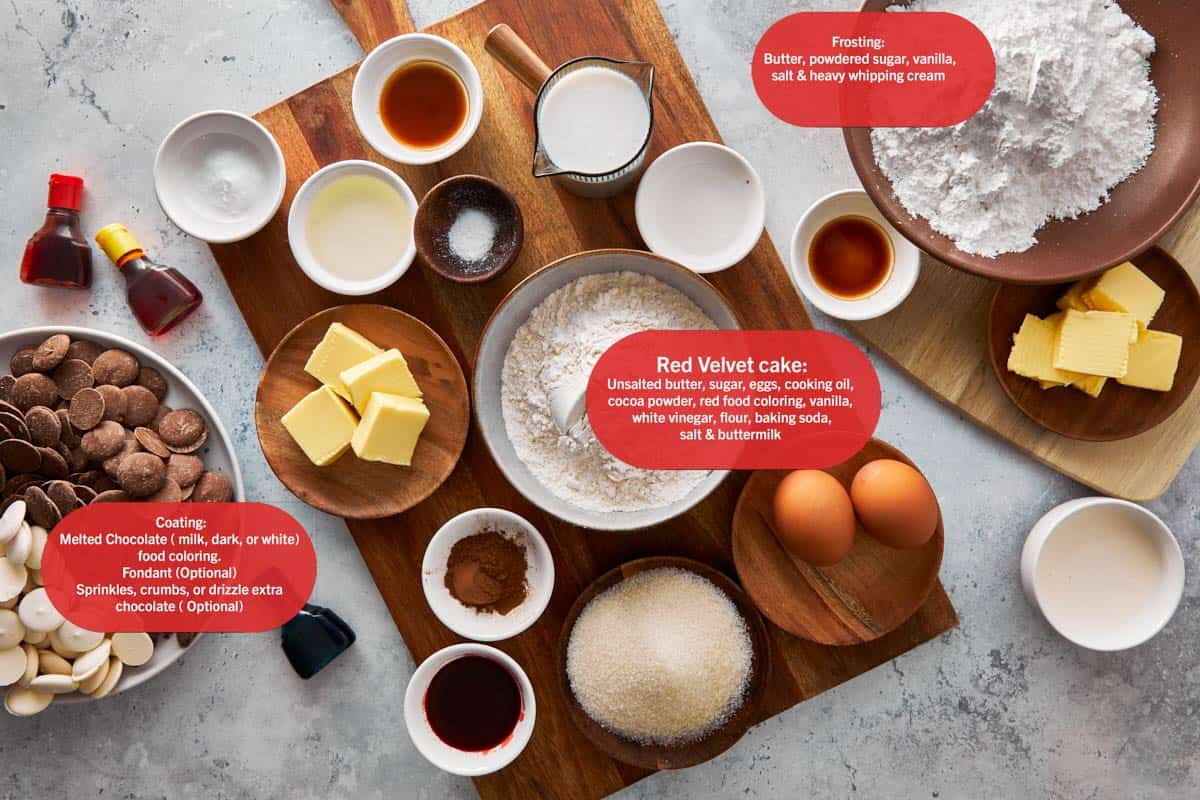
- Red velvet cake base – soft, buttery, and rich in cocoa flavor.
- Frosting – creamy and fluffy, it binds the cake crumbs perfectly.
- Chocolate coating – melted and glossy for that satisfying shell.
- Food coloring & decorations – for turning your pops into spooky little monsters (think candy eyes, sprinkles, or fondant details).
Note: Find the full list of ingredients and measurements in the Recipe Card.
How to Make Them
Moist red velvet inside, glossy chocolate outside, and all the spooky fun in between.
- Make the Red Velvet Cake
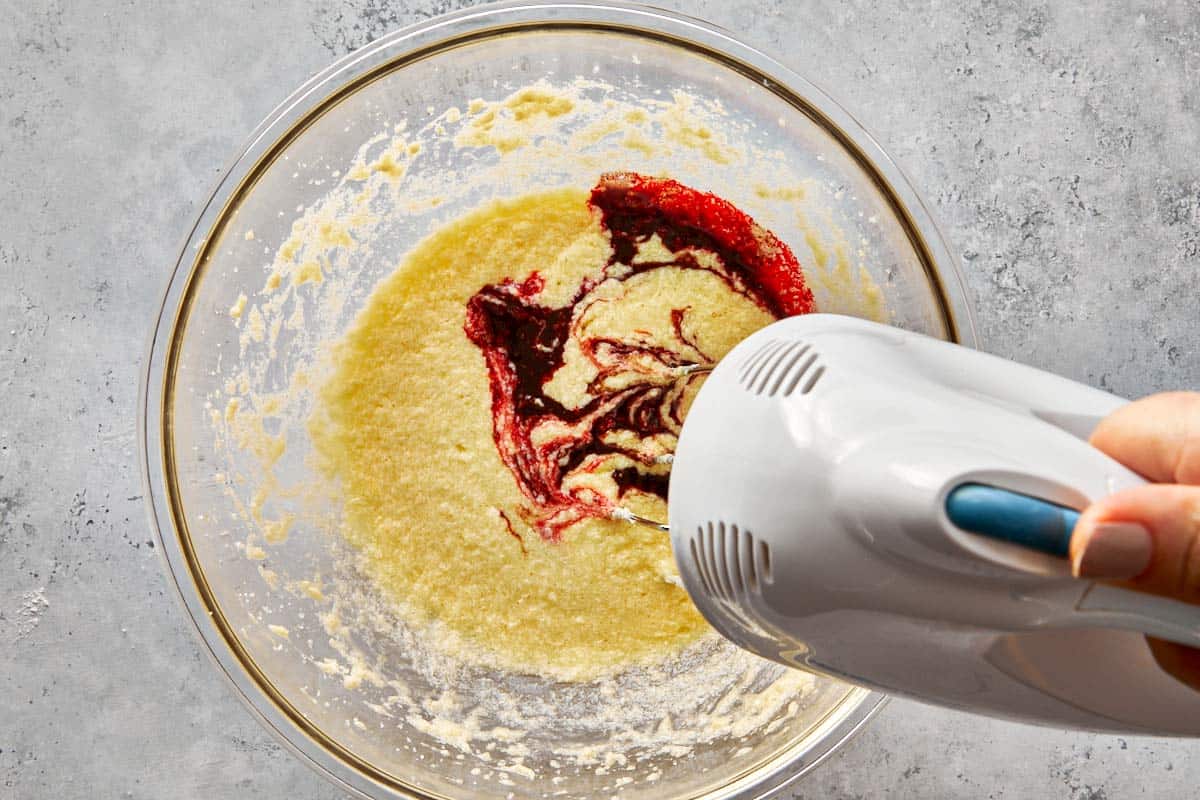
Prepare the red velvet batter, mixing until smooth and evenly colored. You’ll see that perfect deep red shade forming as everything comes together.
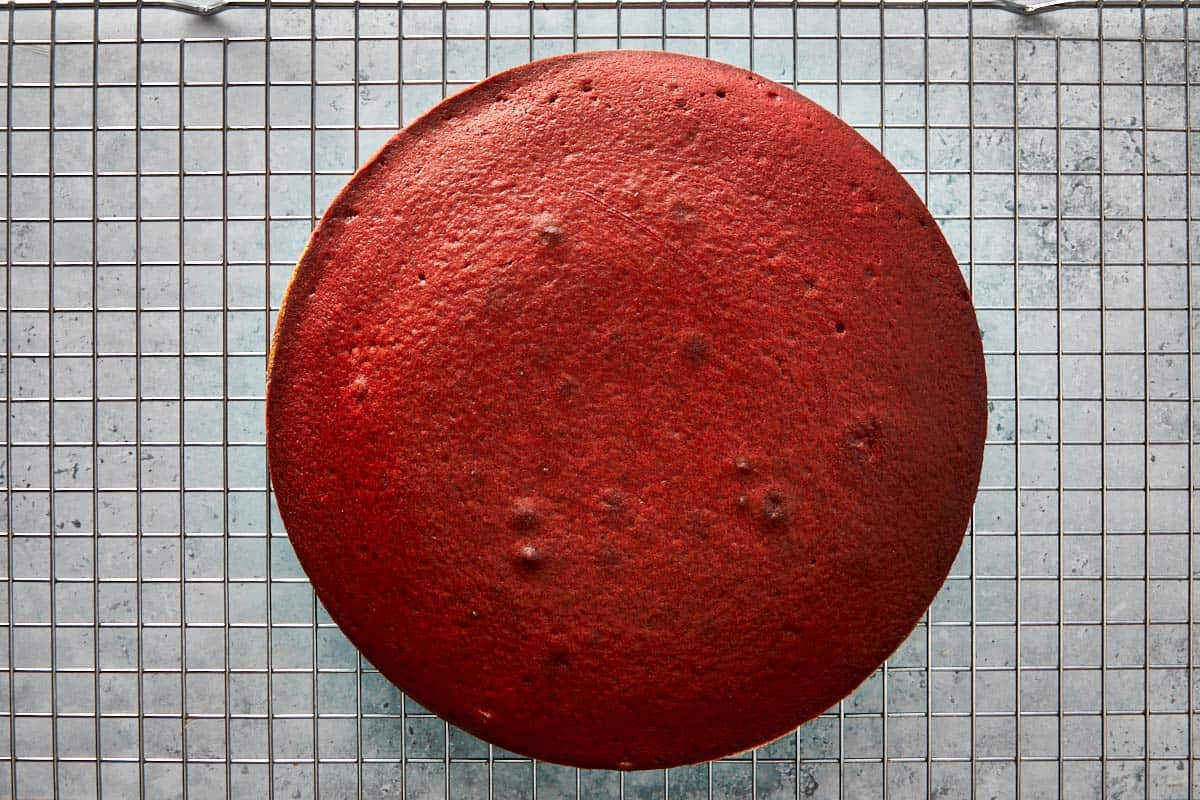
- Bake & Cool
Pour the batter into your pan and bake until it’s firm and springy to the touch. Let it cool completely so it’s easy to crumble later.
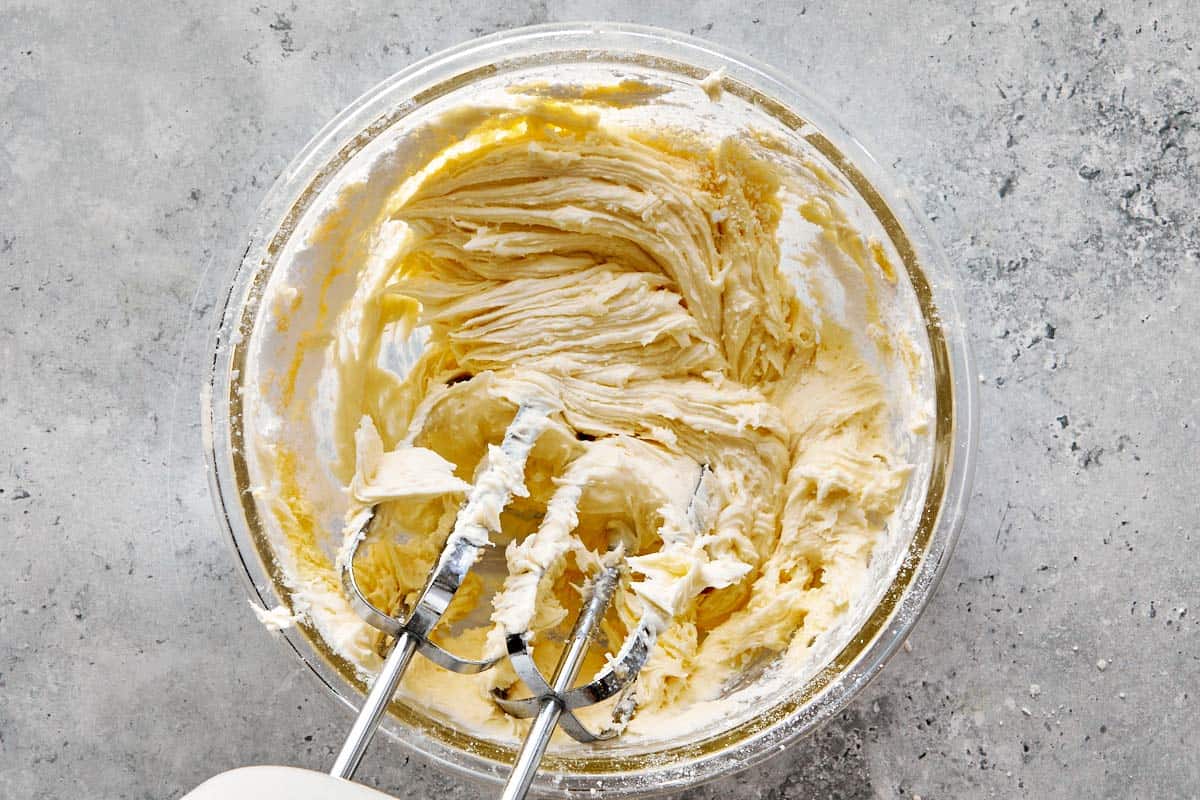
- Make the Frosting
Whip butter, sugar, vanilla, and cream until smooth and fluffy — the texture should be soft and spreadable, perfect for binding the cake.
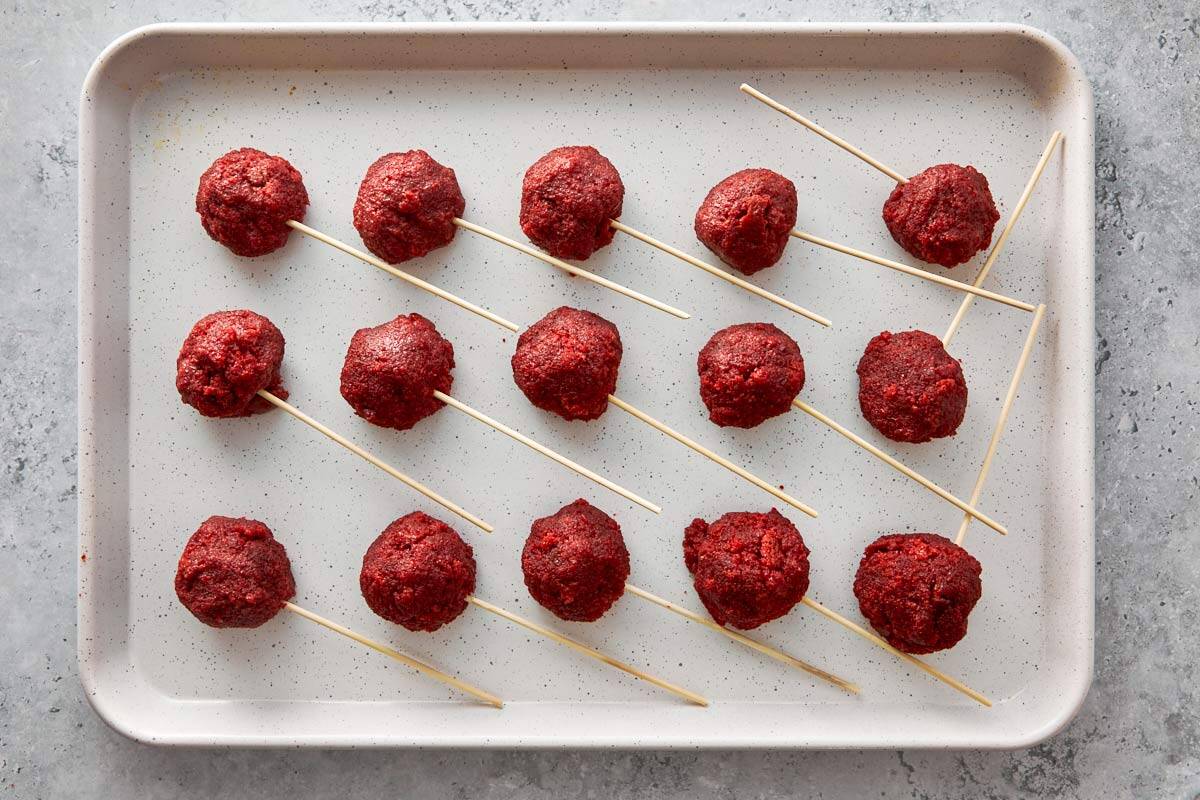
- Form the Cake Pops
Crumble the cake finely, add frosting just until it holds together, then roll into even balls. Insert sticks and chill until firm.
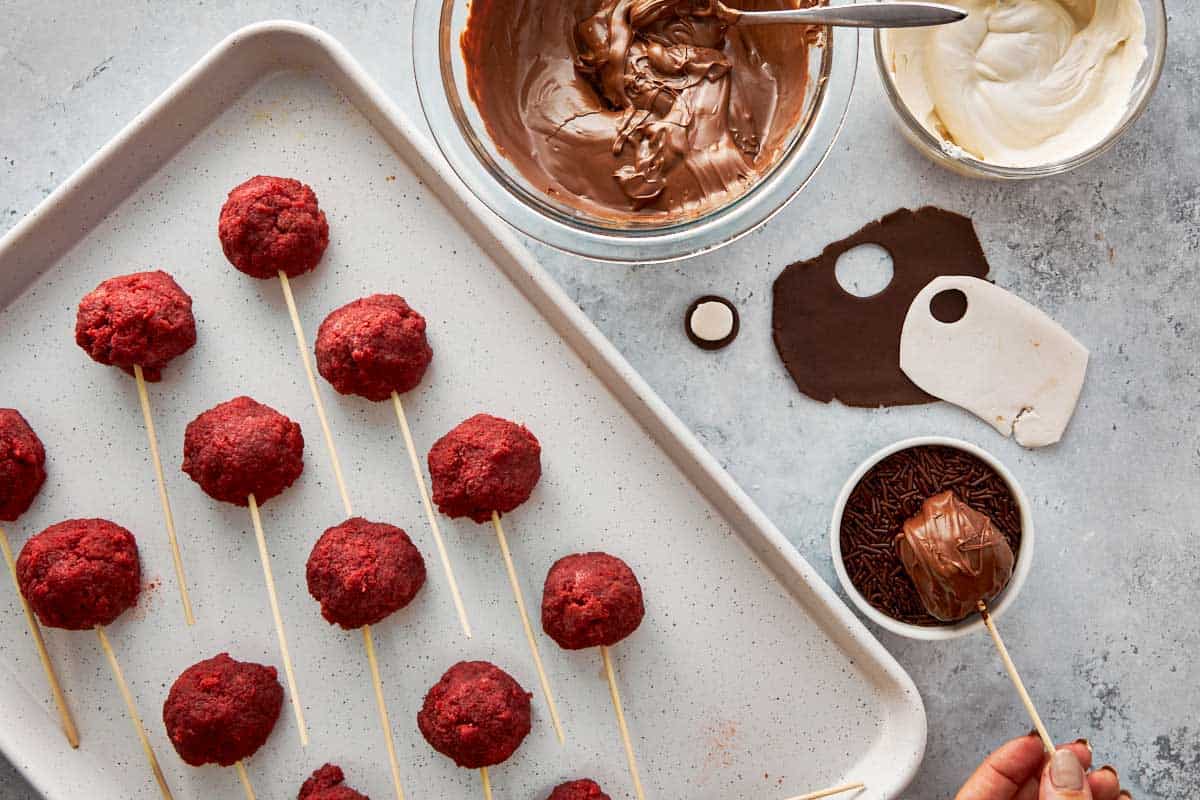
- Dip & Coat
Melt the chocolate, tint if desired, and dip each pop until fully coated. Let the excess drip off, then add sprinkles or drizzle extra chocolate for texture.

- Decorate & Set
Give your monsters their final touch, candy eyes, sprinkles, or fondant details. Stand them upright to set completely before serving.
Want to see how it all comes together? You can See It In Action and follow the full step-by-step.
For a mixed-and-match Halloween spread, pair these pops with Swiss Meringue Ghosts for something light and crisp, keep things comfy with Easy Apple Crumble, lean playful with Churro Apple Pie Bowls, or go all-in on decadence with Nutella-Stuffed Salted Caramel Blondies or my Chocolate Spider Cake. Together, they hit every texture: airy, crumbly, crunchy, and fudgy, without stealing the spotlight from your monsters.
FAQS
You can make them up to two days in advance. Keep them chilled and covered, then let them come to room temperature before serving.
Once the chocolate coating has set, store the cake pops in an airtight container in the fridge for up to five days.
That usually happens when the melted chocolate is too hot or the cake balls are too cold. Let both come to room temperature before dipping.
Yes! Just bake and crumble the cake as usual. The frosting step stays exactly the same.
Melting chocolate or candy coating melts smoothly and sets firmly, giving the pops that perfect glossy finish.
See It In Action: Step-By-Step
You might also like

Get a free eBook!
Subscribe to Cafe Delites FOR FREE and receive recipes straight into your inbox!
Red Velvet Monster Cake Pops Recipe
Ingredients
For the Red Velvet Cake
- ¼ cup unsalted butter softened
- ½ cup caster sugar
- 2 large eggs
- 2½ tbsp cooking oil
- 1 tsp unsweetened cocoa powder
- 2 tbsp red food coloring liquid
- 1 tsp pure vanilla extract
- 2 tsp white vinegar
- 1¼ cups all-purpose flour
- ½ tsp baking soda
- ½ tsp salt
- ½ cup buttermilk
For the Frosting
- ⅓ cup unsalted butter softened
- 2 cups powdered sugar
- ½ tsp pure vanilla extract
- 5 tbsp heavy whipping cream
- 1 pinch salt
For Coating
- 2½ cups melted chocolate milk, dark, or white — your choice
Optional
- Food coloring
- White and black fondant
- Sprinkles, crumbs, or drizzle extra chocolate
Instructions
Make the Red Velvet Cake
- Heat oven to 350°F (175°C). Lightly grease and line an 8-inch (20 cm) baking pan with non-stick baking spray or parchment paper.
- In a large bowl, beat the butter and sugar together until pale and fluffy.
- Add the eggs one at a time, beating well after each addition.
- In a smaller bowl, combine the oil, cocoa powder, red food colouring, and vanilla extract until smooth.
- Stir this mixture into the creamed butter mixture. Add the vinegar and mix to combine.
- In a separate bowl, sift together flour, baking soda, and salt.
- Add half of the dry ingredients and half of the buttermilk to the wet mixture, mixing until combined. Repeat with remaining dry ingredients and buttermilk until smooth.
- Pour batter into the prepared pan and bake for 25–30 minutes, or until a toothpick inserted into the centre comes out clean. Cool completely on a wire rack.
Make the Frosting
- In a medium bowl, beat the butter and salt for about 1 minute until smooth
- Gradually add powdered sugar and beat until fluffy.
- Add vanilla extract, then pour in heavy cream while mixing.
- Beat until smooth and fluffy. Set aside.
Form the Cake Pops
- Once the cake is cooled, crumble it finely with your hands or a fork.
- Add frosting, a spoonful at a time, and mix until the mixture holds together when pressed.
- Roll into 15 even balls. Insert a cake pop stick into each and chill in the fridge until firm (about 30–60 minutes).
Coat in Chocolate
- Melt chocolate in a microwave or double boiler.
Optional
- Add food coloring to the melted chocolate for your monsters, white chocolate will dye a much better color
- Dip each cake pop into the melted chocolate, swirling to coat evenly.
- Decorate as desired with sprinkles, crumbs, or drizzle extra chocolate. Or use a black circle of fondant over a larger white circle and stick it on to create an eye.
- Stand cake pops upright in a styrofoam block or holder to set completely.
To Serve:
- Allow the chocolate coating to set completely before serving.
- Store cake pops in an airtight container in the fridge for up to 5 days.
Notes
- Make sure the cake is completely cooled before crumbling — warm cake will make the mixture too wet.
- Add frosting gradually; you only need enough to hold the crumbs together.
- If the mixture feels too soft, chill it for 10–15 minutes before shaping.
- White chocolate works best if you want to tint your monsters with bright colors.
- Dip the end of each stick in melted chocolate before inserting it — it keeps the pops secure.
- Let the coating set at room temperature before refrigerating to avoid cracks.
- Store in an airtight container in the fridge for up to 5 days or freeze for up to 1 month.
Nutrition
Nutrition information is automatically calculated, so should only be used as an approximation.


So much fun, and deliciously tasty inside, my kids loved to make these, great idea Karina! Thank you.