This post may contain affiliate links. Please read our disclosure policy.
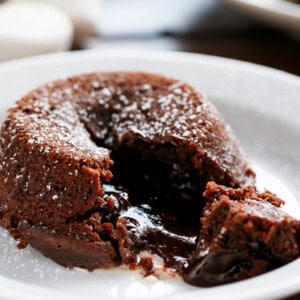
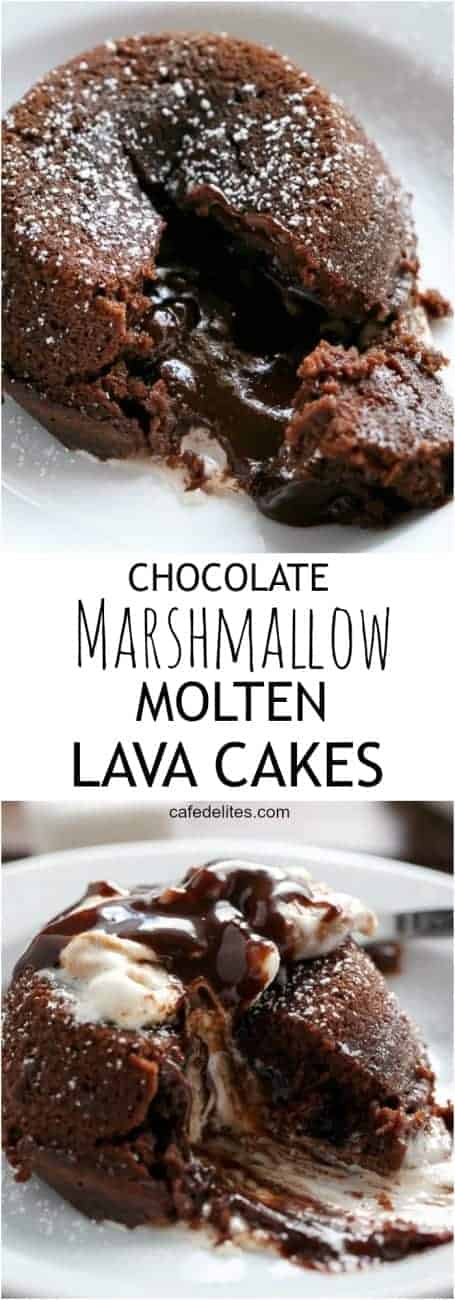
Chocolate Molten Lava Cakes with a gooey marshmallow center! Baked right in a muffin tin, this easy lava cake recipe doubles as a delightful marshmallow lava cake for an extra gooey surprise.
Chocolate doesn’t cause problems…it solves them—especially in the form of soft, decadent Choco Lava Cake or a fun smores lava cake that oozes molten goodness with every bite.

What Makes This Recipe Work
This Choco Lava Cake works because it perfectly balances a tender, soft cake exterior with a molten, gooey chocolate and marshmallow center. The muffin tin method makes it easy for anyone to achieve that restaurant‑style lava effect at home.
It’s also versatile—transform it into a marshmallow lava cake or smores lava cake by adding marshmallows or graham cracker crumbs. Every bite delivers a rich, indulgent experience that keeps everyone coming back for more.
What Goes Into Choco Lava Cake
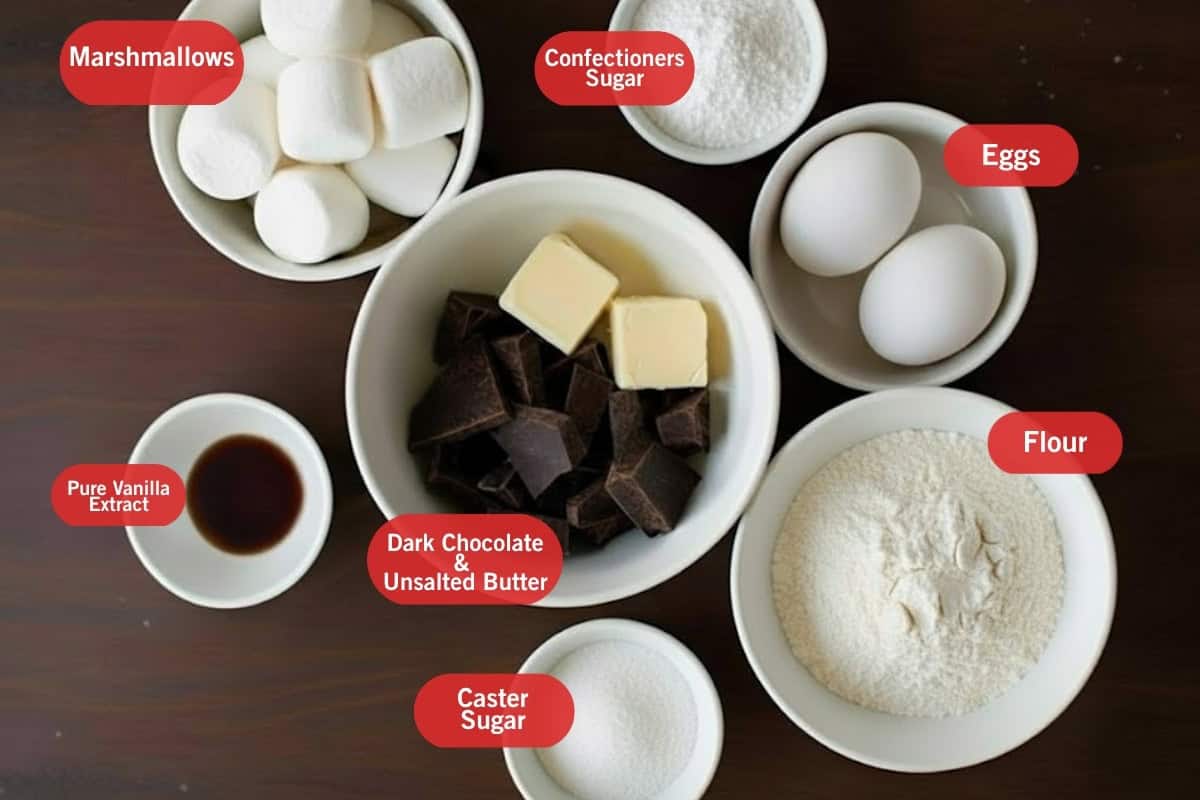
To make this indulgent Choco Lava Cake, a few essential ingredients give it that soft, gooey, molten center:
- Unsalted Butter: Adds richness and ensures a tender, moist cake.
Dark Chocolate (Lindt 70%): Provides deep, decadent chocolate flavor that melts beautifully.
Eggs: Give structure while keeping the interior soft and custardy.
Marshmallows: Create a gooey surprise in the center, perfect for a marshmallow lava cake twist.
Note: Please see recipe card at the bottom for a full list of ingredients with measuirements.
How To Make Choco Lava Cake
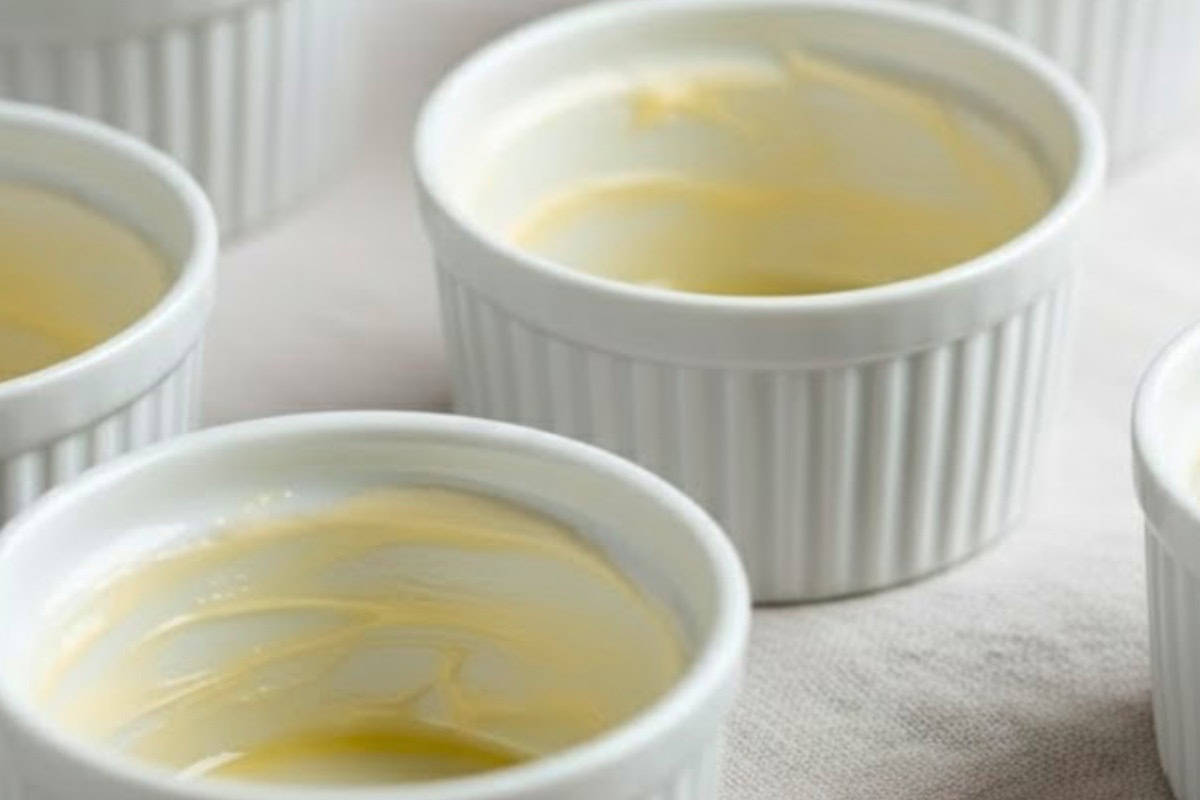
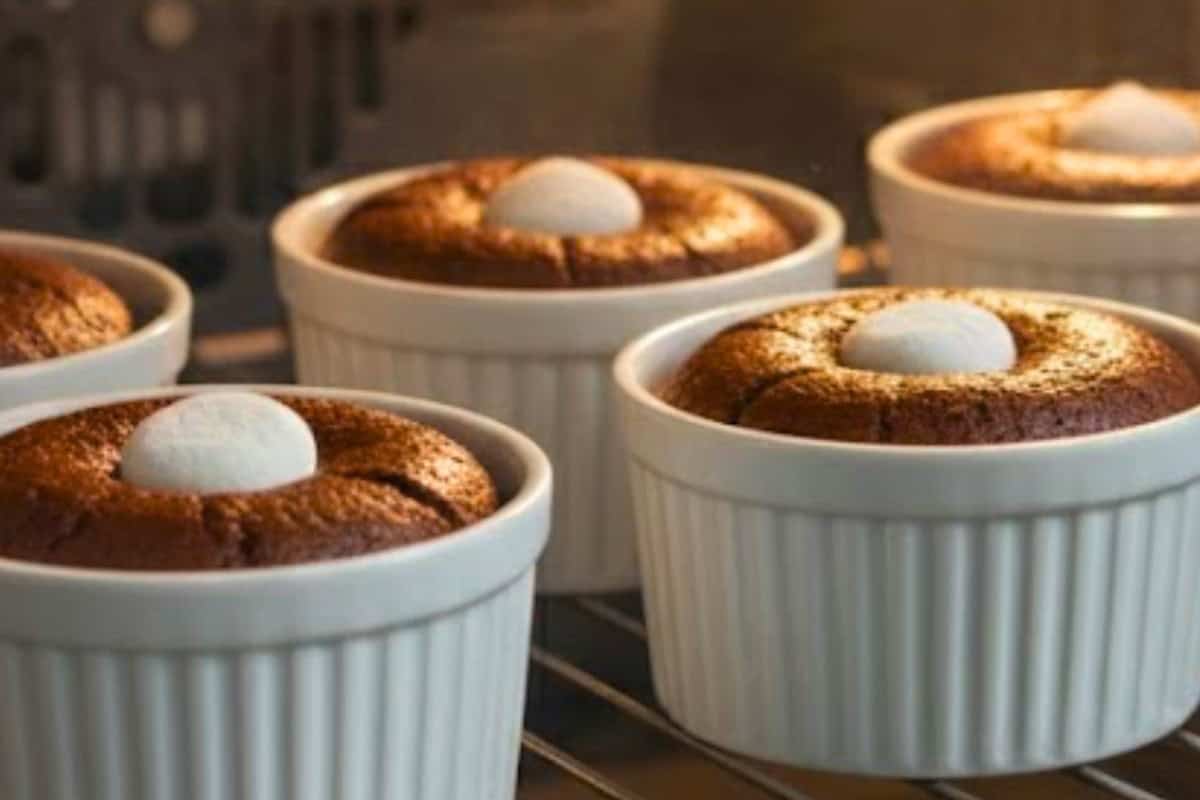
- Preheat the Oven: Preheat your oven to 425°F (220°C). Lightly grease a 6-hole muffin tin or six small ramekins with butter or cooking spray, wipe away any excess, and set aside while you prepare the batter.
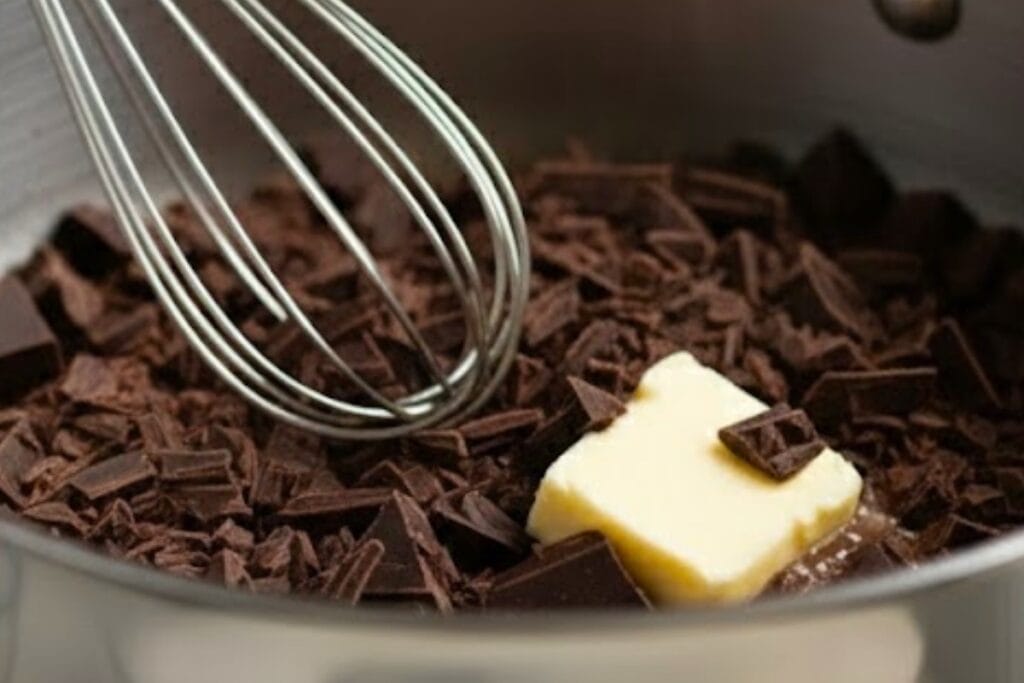
- Melt the Chocolate and Butter: Combine butter and chocolate in a medium saucepan over low heat, stirring until melted and smooth. You can also melt them in a microwave-safe bowl in 30-second intervals, stirring well after each.
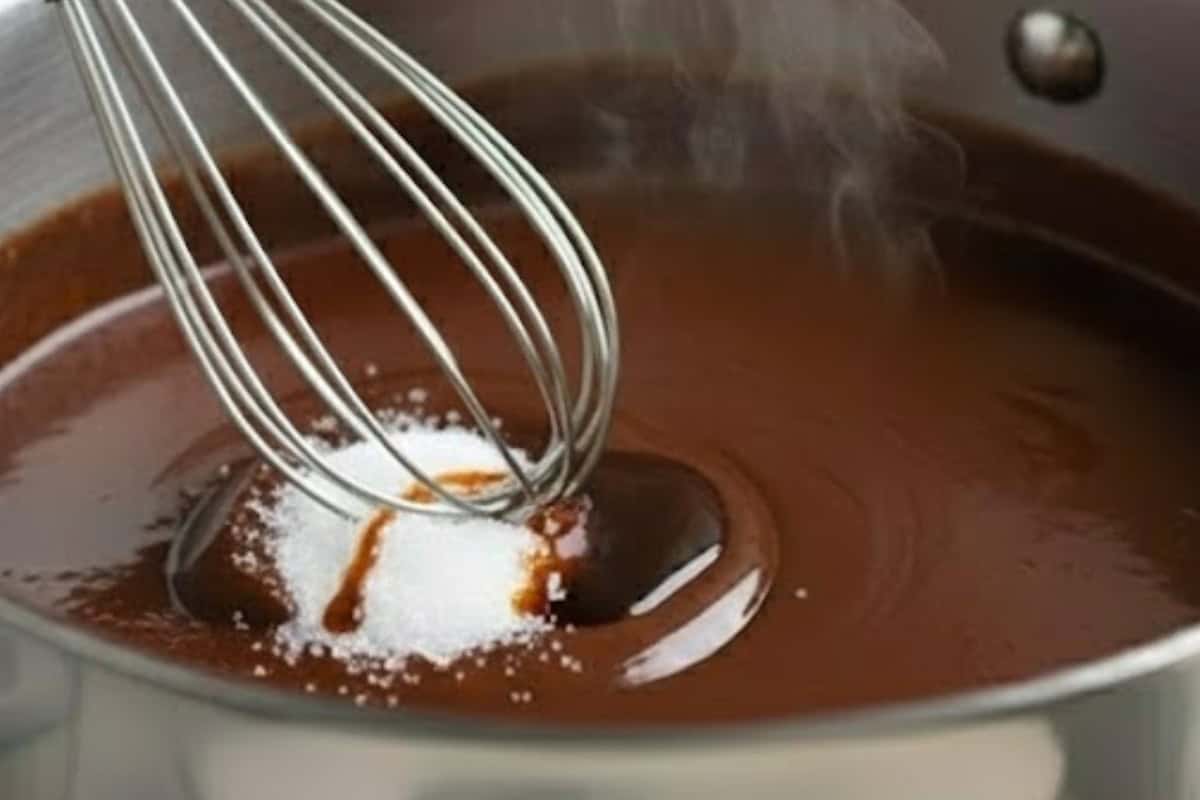
- Mix in Sugar and Vanilla: Remove from heat and stir in caster sugar and vanilla extract until fully combined.
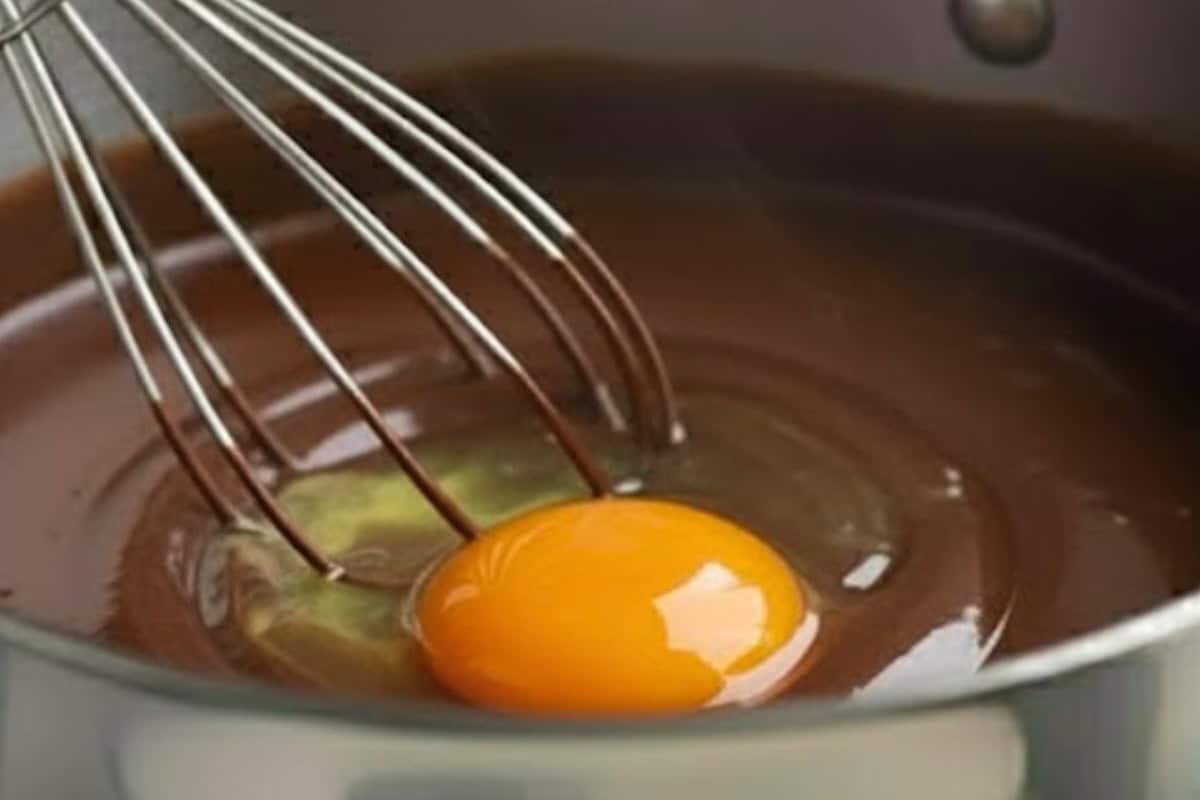
- Add Flour and Eggs: Whisk in flour until smooth, then add eggs one at a time, creating a silky, thick chocolate batter.
- Fill and Add Marshmallows: Pour batter into prepared molds, then press one marshmallow into the center of each. They’ll float slightly but sink while baking.

- Bake and Serve: Bake for 10 minutes until edges are set. Cool for 5 minutes, loosen with a knife, then transfer. Dust with icing sugar and serve immediately.
For a cozy dessert night, pair your gooey Choco Lava Cake with a scoop of Nutella Hot Chocolate—the chocolate-on-chocolate combo is pure indulgence. For a fruity contrast, serve alongside Strawberry Cheesecake Crepes, which add a light, tangy sweetness to balance the rich chocolate center.
If you want something crunchy and fun, a side of Peanut Butter Choc Chip Deep Dish Skillet Cookie works perfectly, giving an extra layer of texture and chocolatey delight. These three pairings turn your lava cake into a show-stopping dessert spread everyone will love.
Tips For Making Choco Lava Cakes
- Do not overbake—the edges should be set but the center still soft for that perfect molten effect.
- Use room-temperature eggs to help create a smooth, glossy batter.
- For an extra gooey surprise, add a chocolate square or extra marshmallow in the center before baking.
- Grease your muffin tin or ramekins well and dust lightly with flour to prevent sticking.
Recipe FAQ’s
Absolutely! Scoop the batter into greased ramekins, cover tightly with plastic wrap, and freeze. Thaw in the fridge before baking, and then bake as usual.
Yes, milk chocolate can be used, but the center may be slightly sweeter and less intense. Dark chocolate is recommended for that rich, deep chocolate flavor.
Grease the molds well with butter or cooking spray and lightly dust with flour. Allow cakes to cool slightly before carefully running a knife around the edges.

You might also like
Get a free eBook!
Subscribe to Cafe Delites FOR FREE and receive recipes straight into your inbox!
Chocolate Lava Cakes
Ingredients
- 1/2 cup unsalted butter
- 3.5 oz dark chocolate I used Lindt 70%
- 1/2 cup caster sugar superfine sugar or white granulated sugar
- 1 teaspoon pure vanilla extract
- 1/4 cup flour
- 2 large eggs
- 6 Marshmallows
- 1 teaspoon confectioners sugar or icing sugar, for dusting
Instructions
- Preheat oven to 425°F (220°C). Lightly grease a 6-hole muffin tin (or 6 small ramekins) with butter or cooking oil spray; wipe excess over with a paper towel and set aside.
Stovetop:
- Combine the butter and chocolate in a medium-sized saucepan over low heat. Cook while stirring until melted and smooth.ALTERNATIVELY: Combine butter and chocolate in a medium-sized microwave safe bowl; melt in 30 second increments stirring between each until chocolate and butter are melted and well combined.
- Remove from heat (or microwave); stir in sugar and vanilla.
- Add flour to the chocolate mixture in the pan; whisk until combined. Whisk one egg into the mixture at a time until a smooth chocolate batter is formed..
- Pour the batter into the prepared muffin tray (or ramekins) until full. Add 1 marshmallow into each mould and press them down (they will float up slightly but sink while baking).
- Place muffin tray onto a baking tray and bake for 10 minutes or until the edges have set but the centre of each cake is a little soft. Allow to cool in the muffin tray for 5 minutes.
- Using a knife, gently pull cake away from the sides of the tray before turning out onto a baking tray lined with parchment/baking paper. Lift each cake onto a serving plate with a wide spatula while still warm and gooey (or they will stick to the tray if left for too long).
- To serve, dust with powdered/icing sugar.
Notes
Nutrition
Nutrition information is automatically calculated, so should only be used as an approximation.
 Hot Chocolate transformed into Lava Cakes with melted gooey marshmallow baked into the centre! All in a muffin pan and so easy to bake! https://cafedelites.com” />


What size marshmallows did you use?
I tried this recipe as I was craving for some desserts and It was so deliciously, everybody just loved it. I will definitely share this with my friends too.
Omg!! This looks so delicious. I’ll love to try this recipe. My kids going to love it.
Hi Karina,I have tried many of your recipes like fudge brownies,chocolate fudge cake, red velvet cake,lemon cake and they all turned so well everyone loved it. Lava cake next. Thank you so much for sharing such deliciously tempting easy recipes . hope to see more .
Would it be ok to frosting these? I know my son would love to bring this to school for his birthday and his class would freak. Would they still be good if I made them the day before they were eaten?
Hi Jill. Unfortunately they won’t be ‘lava cakes’ if made a day before. These are best eaten straight after baking. You can frost these also, just every gently 🙂
Hi Karina,
Can I freeze these lava cakes?
( Made brownies today with your method and achieved crusty too… Everyone loved them)
Thanks 🙂
Thanks for another amazing recipe! As I am eating sugar free can I sub the sugar for splenda and use sugar free chocolate? Maybe adjusting baking times? Since splenda bakes faster? Can’t wait to make these.
Hi Sabrina! Yes you van use Splenda. I’d keep the baking times as they are to properly bake the other ingredients in the recipe! 🙂
These look amazing ! Fyi there are a couple of typos in the roasted marshmallow step…. just thought you’d like to know
Oh no, thank you for the tip Renee!
Those weren’t typos. Europeans spell center as centre.
These look like heaven!! I was wondering if I have a 12 hole muffin tin, do I have to adjust cooking times?? Thanks so much!
Hi Angela! If you’re going to spread the batter out into 12 muffin holes, then yes you won’t need to bake them for as long. Try 5 minutes first and see how you go. I hope the centres stay ‘molten’ for you! If you try it, please let me know how you went! I’d love to hear back Xxx
Me encanta lo que haces mezclas sabores que jamas en mi vida había probado mi favorito es el banoffe french toast 🙂
Gracias Nathalie! Me alegro mucho!