
Taco Cups Recipe
These cups turn traditional taco flavors into a fast, grab-and-go meal. Juicy chicken, melted cheese, and fresh avocado pico de gallo are baked into crispy mini flour tortillas or low-carb capsicums for an easy, highly customizable dinner.
Servings: 16 taco cups
Equipment
- 1 muffin tray 12 pieces.
Ingredients
For tortillas cup:
- 16 flour tortillas or capsicums
For meat:
- 1.2 lbs chicken thighs boneless and skinless, diced
- 1 tbsp olive oil
- 3 tbsp mexican spice mix for tacos
- 1 red onion sliced finely
- 4 cloves garlic finely chopped
- 1/2 cups sweet corn canned and drained
- 1/2 cups tomatoes diced
- 1 tbsp tomato paste
- 3 tbsp light cream cheese.
- 1/2 tsp salt
Pico de gallo with avocado:
- 1 Avocado cubed
- 1 1/4 cups cherry tomato cut into 6
- 1 jalapeno finely chopped
- 1/4 cups coriander (fresh cilantro) chopped
- 1/2 lime juice
- 1 pinch salt and pepper
Topping:
- light sour cream
- 1 1/4 cup shredded mozzarella cheese
- 1 1/4 cup shredded cheddar cheese
Instructions
Pico de Gallo
- In a bowl, add all the pico de gallo ingredients and stir to combine. Reserve in the fridge.
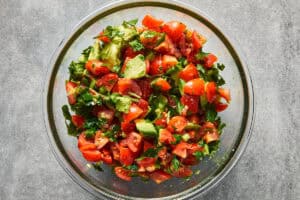
Leave the avocado pit in the bowl with the salsa. It actually helps slow down the avocado from turning brown while it sits in the fridge.
Chicken:
- In a separate bowl, add the diced chicken, Mexican spice mix, and olive oil. Mix well to completely coat the chicken.
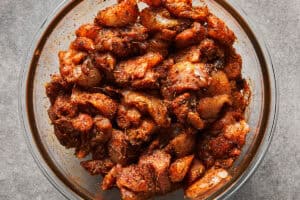
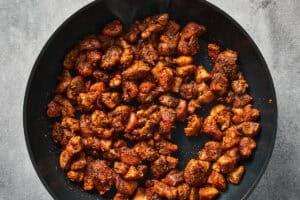
- Spray a large pan with oil and heat over medium-high heat. Add the chicken and cook until browned and almost cooked through.
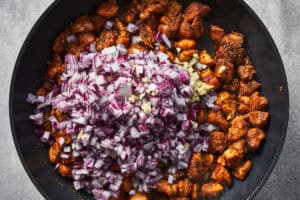
- Add the sliced red onion and minced garlic to the pan. Stir and cook for 2 more minutes until the onions are tender.
- Stir in the diced tomatoes, sweet corn, tomato paste, light cream cheese, and a pinch of salt and pepper. Cook for 2 to 3 minutes until the sauce coats the chicken and thickens, then set aside.
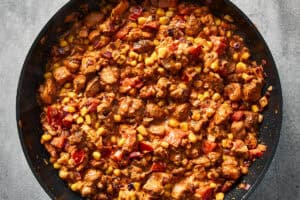
Try not to overcrowd the pan or constantly stir the meat. Letting it sit undisturbed for a minute gives you a much better crust.
For tortilla cup:
- If you are going the classic route, grab a 12-hole muffin tray. Gently press one mini flour tortilla into each hole, folding the edges slightly so it naturally forms a bowl shape.
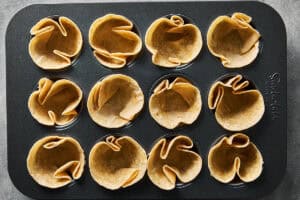
- Add a small pinch of cheese to the bottom of each tortilla cup, then spoon in the meat filling, and finish with a bit more cheese on top.
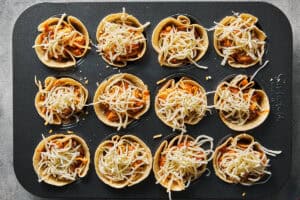
Preheat your oven to 400°F (200°C).
Leave a tiny bit of space at the top of the tortilla so the cheese does not overflow and burn on the tin while baking.
For Assembly Capsicum cup:
- If you are making the low-carb version, slice the tops off your capsicums and scoop out the seeds inside. Place them on a baking tray, season with a little olive oil, salt, and pepper, and pre-bake them at 400°F (200°C) for 15 minutes to soften them up.
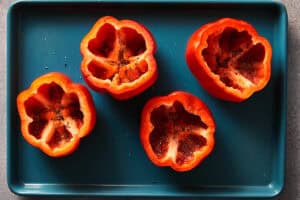
- Remove the capsicums from the oven. Add a small amount of cheese to the bottom of each one, fill almost to the top with the meat mixture, and add more cheese on top.

- Bake the filled tortilla cups and the filled capsicum cups in the oven at 400°F (200°C) for 13 minutes, until the cheese is completely melted and the tortillas are golden brown and crisp.

Let the cups cool slightly so they hold their shape, then carefully remove them from the trays. Top each cup with 1 tablespoon of pico de gallo and 1/2 tablespoon of sour cream to serve.
Notes
Storage, Reheating and Make Ahead
If you end up with leftovers, I highly recommend storing the meat filling and the fresh pico de gallo in separate airtight containers in the fridge. The cooked chicken mixture will last for up to 4 days, and the salsa is best eaten within 2 days before the avocado turns completely brown.- Make ahead: You can cook the filling entirely, let it cool down, and keep it in the fridge until you need it. When it is time to eat, just press fresh tortillas into your tin, fill them with the cold meat mixture, and bake. You might just need to add 2 or 3 extra minutes to the oven time to make sure the center gets piping hot.
- Reheating: If you have already baked the cups, please do not put them in the microwave. The tortillas will steam and turn into a soggy mess. Pop them into an air fryer or a hot oven at 400°F (200°C) for about 5 minutes to crisp the edges back up and melt the cheese again.
- Freezing: You can freeze the cooked chicken filling in a freezer-safe bag for up to two months. Thaw it overnight in the fridge before using it. I do not recommend freezing the fully assembled baked cups because the bases will fall apart when they thaw.
If your mini tortillas feel a bit stiff straight out of the packet, wrap the whole stack in a damp paper towel and microwave them for 10 to 15 seconds. The steam makes them super flexible, which stops them from tearing or cracking when you press them down into the muffin tin.
Nutrition
Calories: 231kcal | Carbohydrates: 22g | Protein: 11g | Fat: 11g | Saturated Fat: 4g | Polyunsaturated Fat: 1g | Monounsaturated Fat: 4g | Trans Fat: 0.004g | Cholesterol: 35mg | Sodium: 456mg | Potassium: 301mg | Fiber: 4g | Sugar: 3g | Vitamin A: 388IU | Vitamin C: 7mg | Calcium: 196mg | Iron: 3mg